Virtual Lift guide
Posted: Fri Jun 28, 2013 9:05 pm
First off what is it?
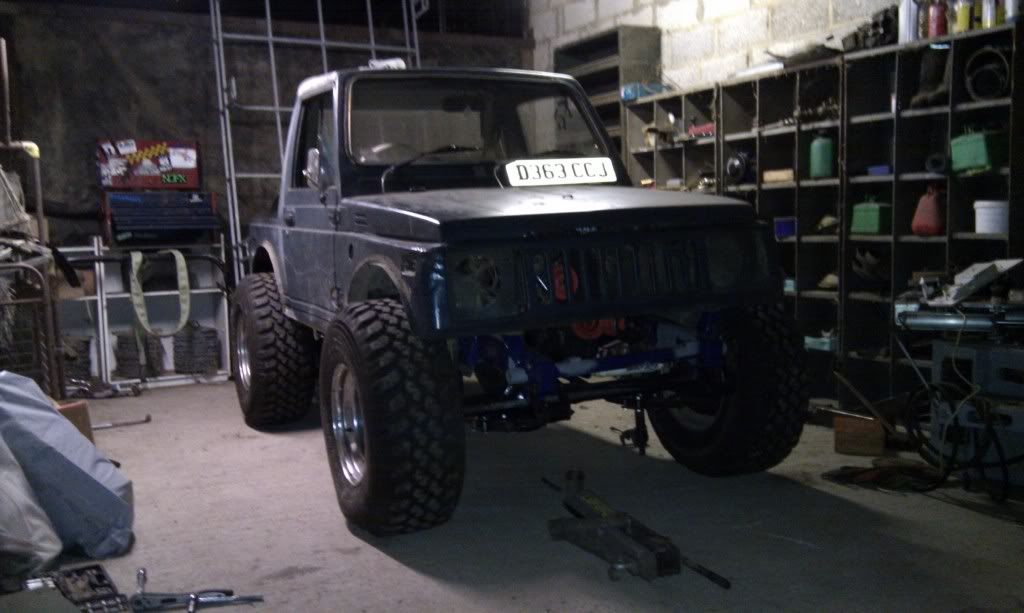
A virtual lift (or "VL" for short) is the removal of material from the body of the truck to facilitate the fitting of larger tyres without lifting the suspension or the whole body.
Why?
- Run bigger tyres without expensive lift.
- Run bigger tyres but keep center of gravity lower without lift.
- Remove rust and gain the ability to run bigger tyres/more flex at the same time.
Pros
- Above mentioned points.
- Save money on extended brake lines / shocks too.
- With less suspension lift there's no need for steering mods or prop spacers and there's less wear on prop UJs as they won't be running at steep angles.
- Can make it as wide as you want to suit your axle/tyre width.
- Stops mud from getting caught up inside the arch and causing further rust than you probably already have.
- Relatively cheap.
Cons
- Looks odd with tyre sizes smaller than 31"
- Need access to a welder and basic welding skills
- Lose originality
- Can warp/buckle your wings (It's an off-roader anyway!!!)
How to do it:
This is how I did my virtual lift which I would consider to be the easiest way of completing one.
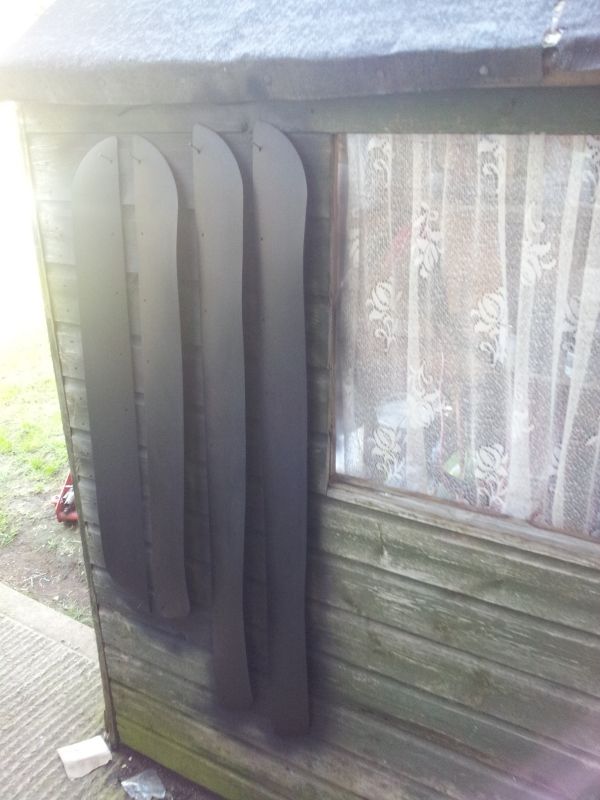
All the new metal is 1.6mm thick mild steel sheet.
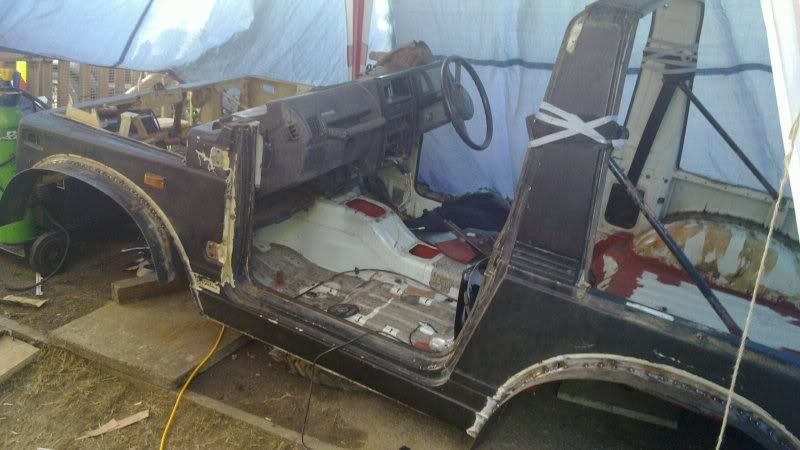
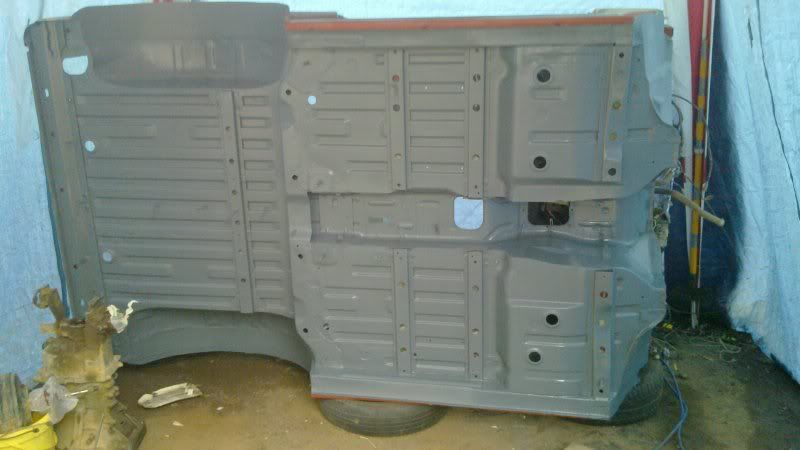
It will be considerably easier to do this with the body off the truck but can be done without removing the body.
Lets start at the front.
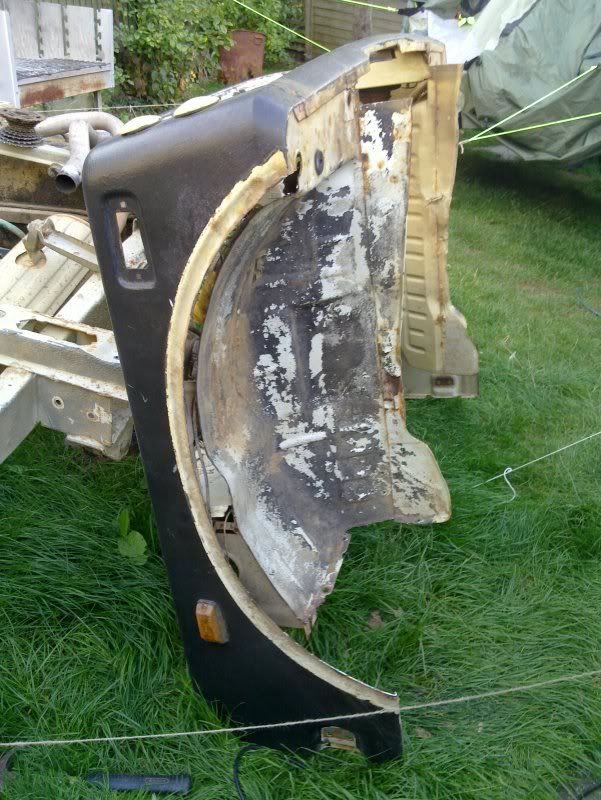
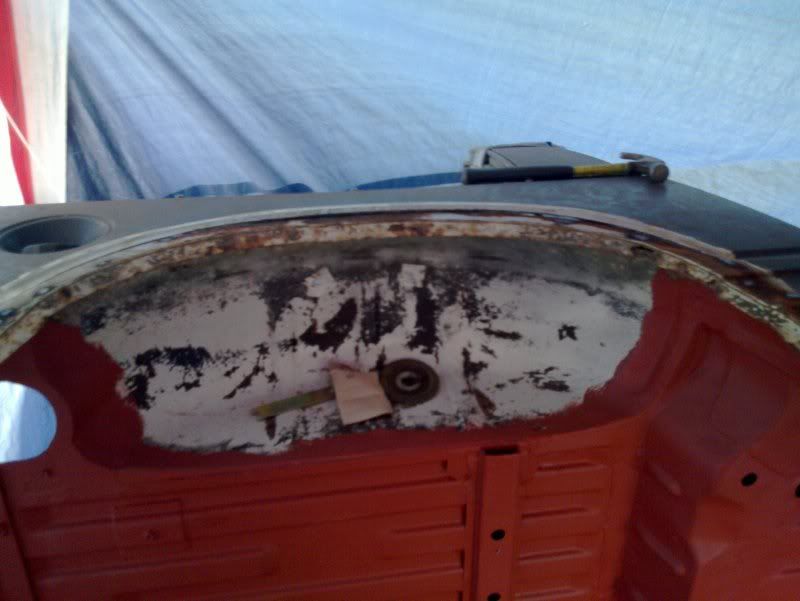
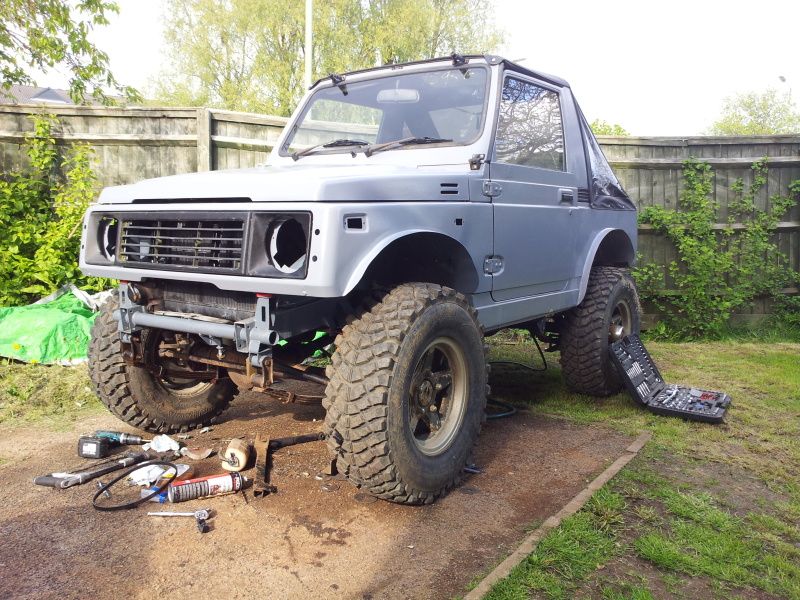
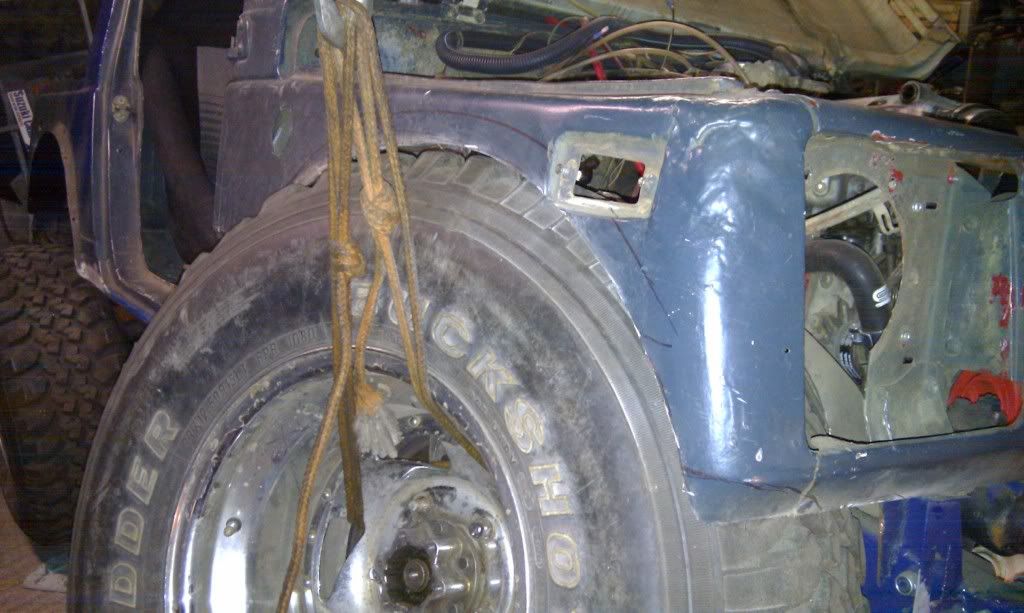
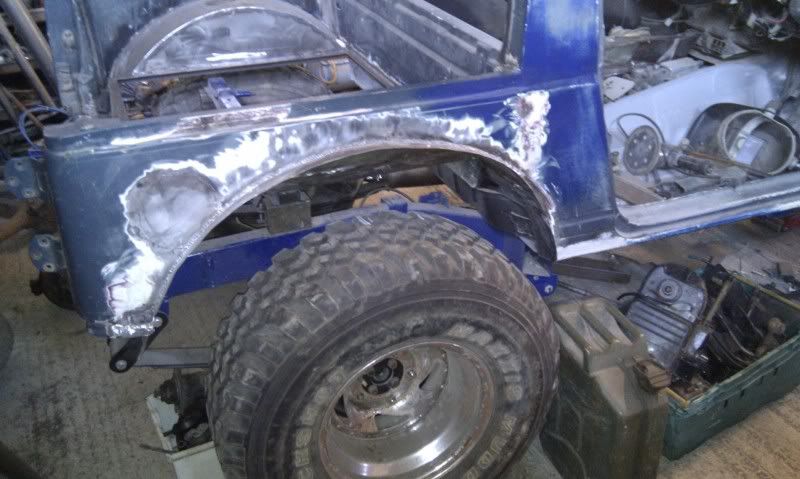
1. Remove the plastic arches and drill/grind the spot welds to remove the metal bracket the plastic arch was clipped to from the arches.
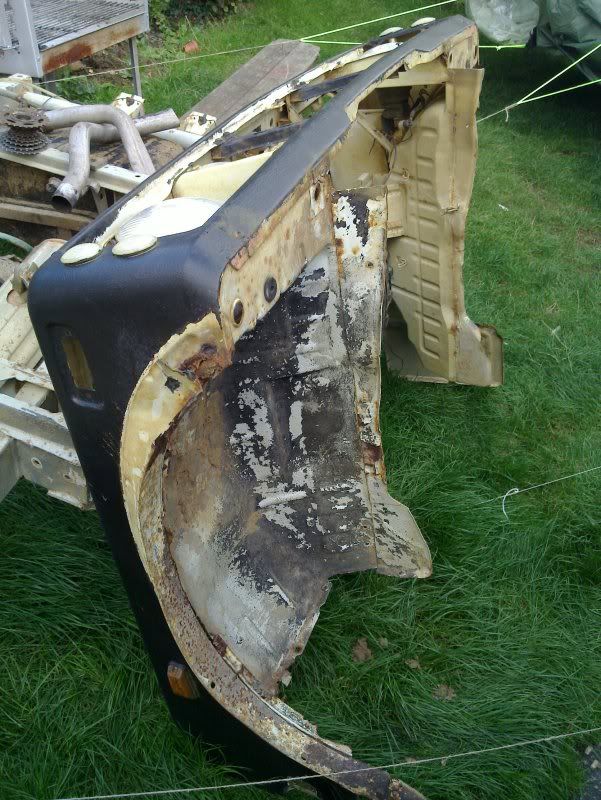
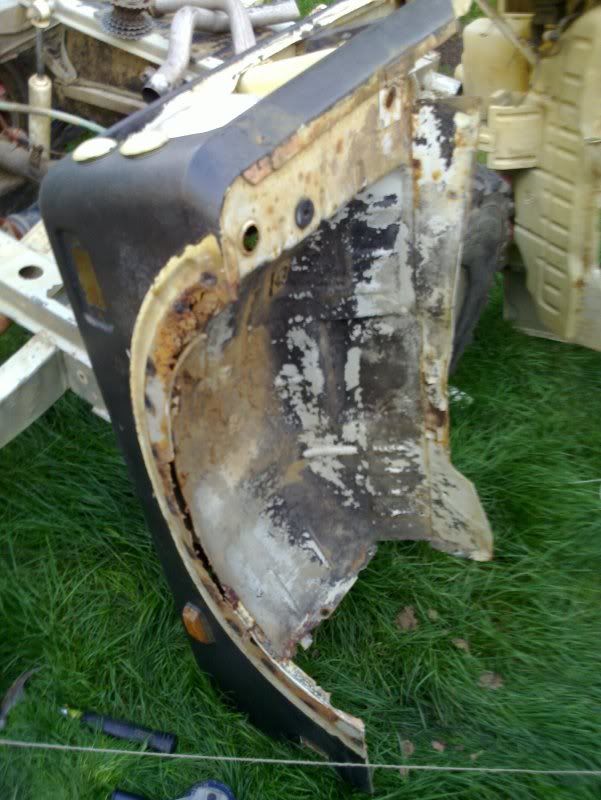
2. Now use the pressed indent underneath (will have already been on show on a 410) as a guide and trim the outer wing round the bottom of the indent. (You will have to guess at the ends as it doesn't continue all the way to the front or rear of the arches.
At the same time cut the inner arch at the closest point that you can to the wing that is flat and can result in a nice straight line.
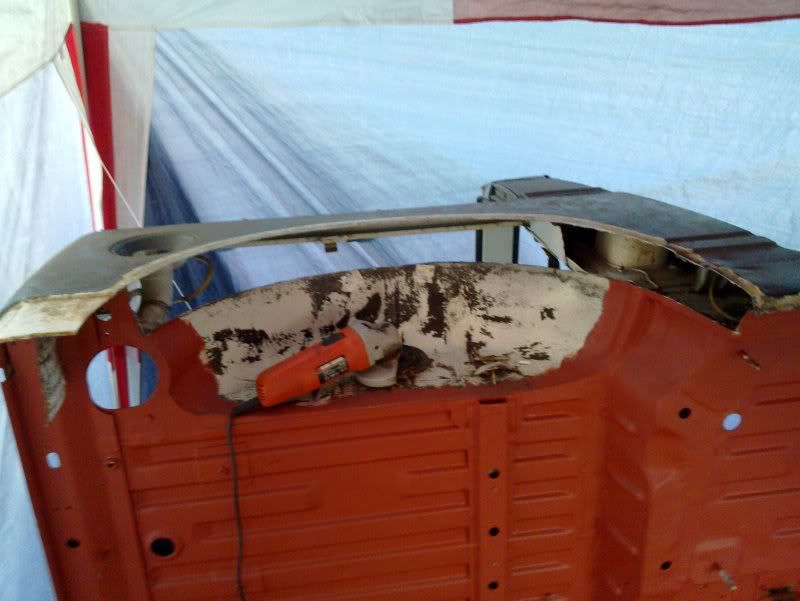
(At this point if the front clip is still on the truck it will reveal how much of the bulkhead will also need trimming.)
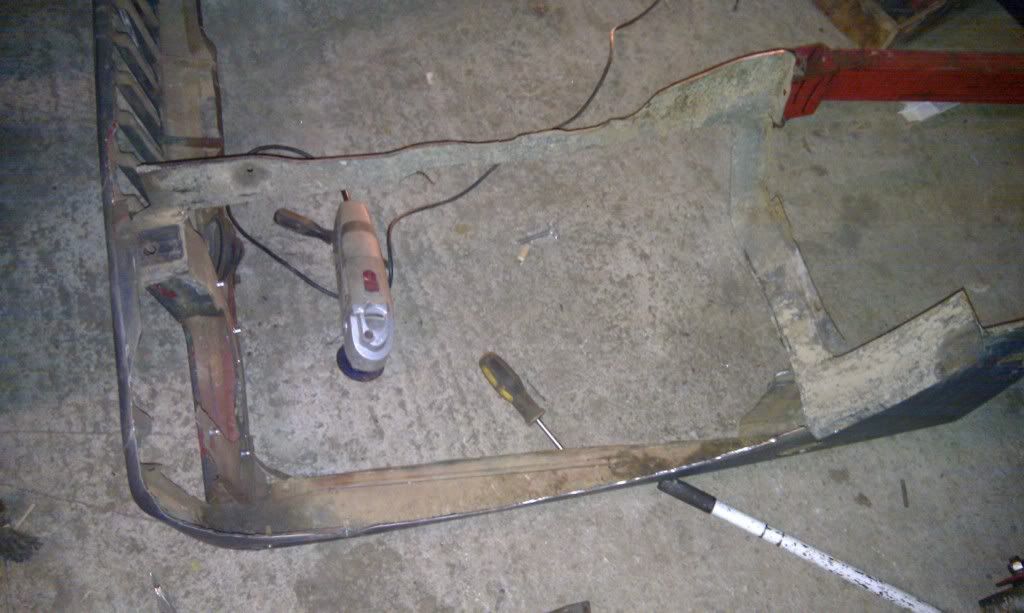
3. Re-fit (If you took it off) the front clip to the body tub and follow the shape of the new arch shape onto the bulkhead. (I found it best to make this a bit less curved and just carry on back from the arch at a suitable diagonal.)
Mark twice and cut once. (you don't want to get this bit wrong!) (You will need to trim round or remove the accelerator pedal its up to you)
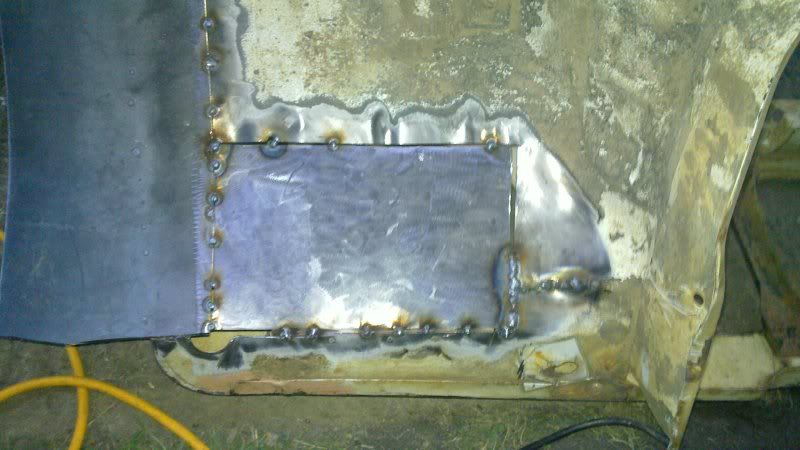
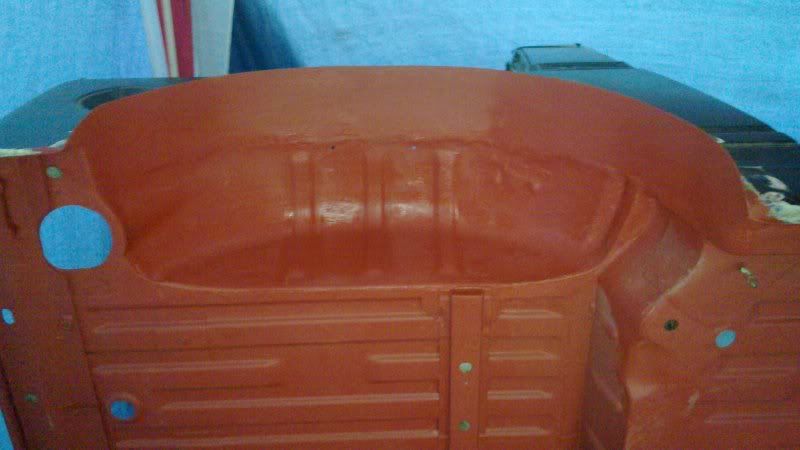
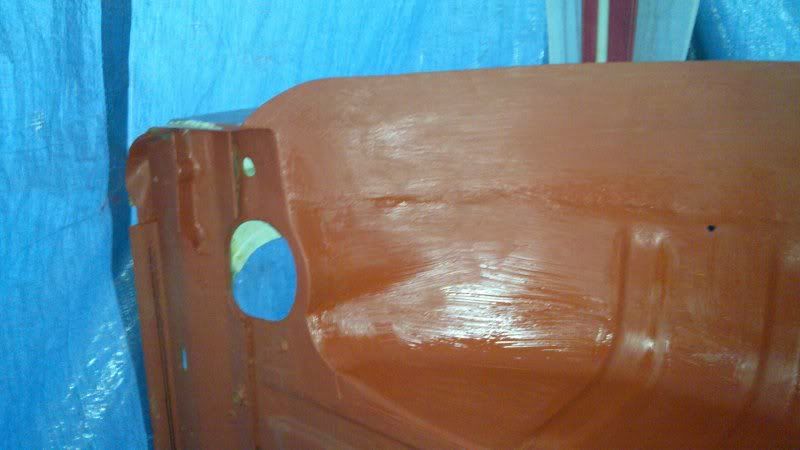
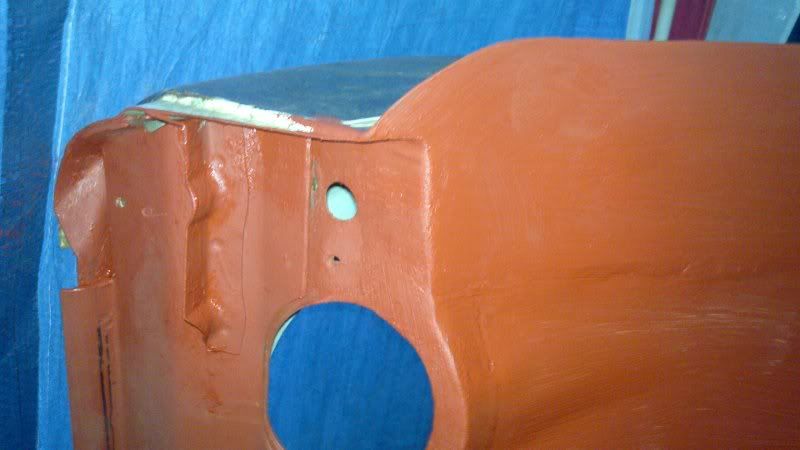
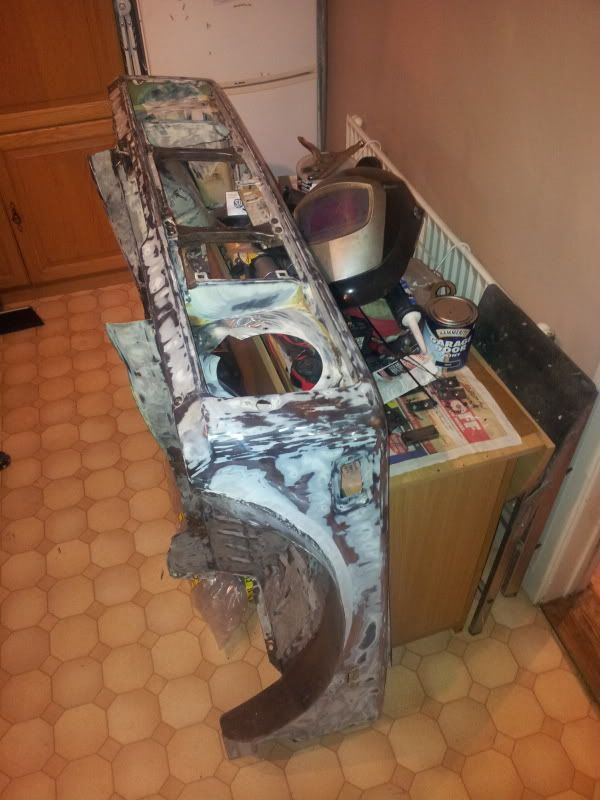
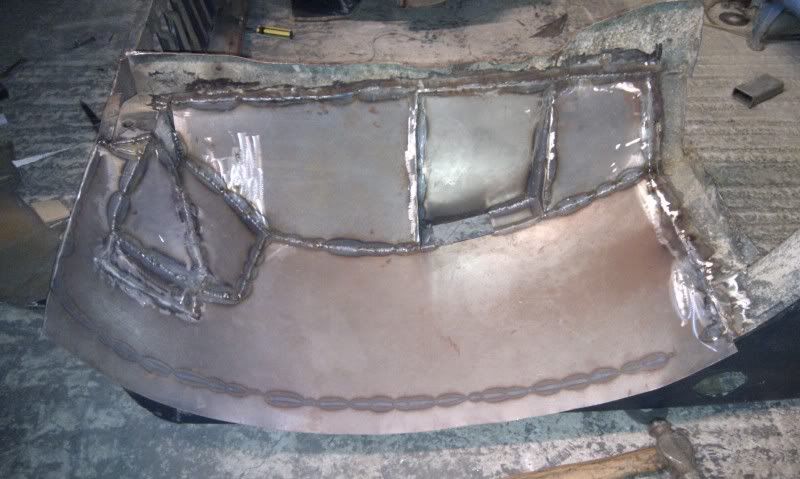
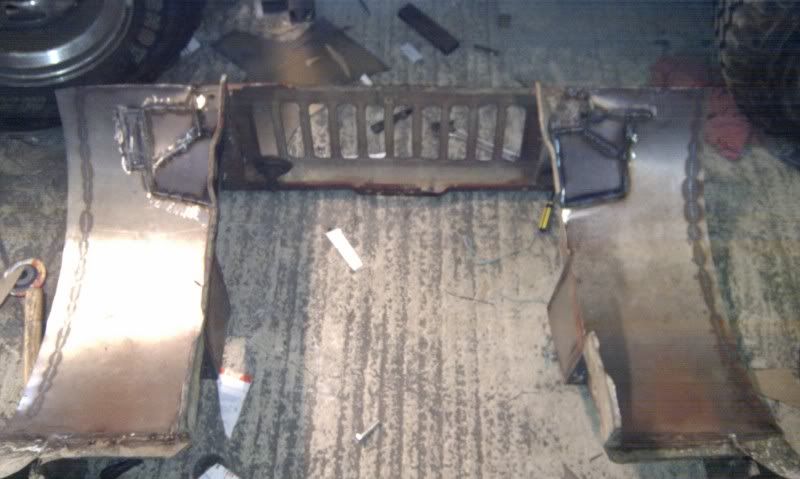
4. Remove the front clip and cut and weld a plate into the holes in the bulkhead (Both sides shown)
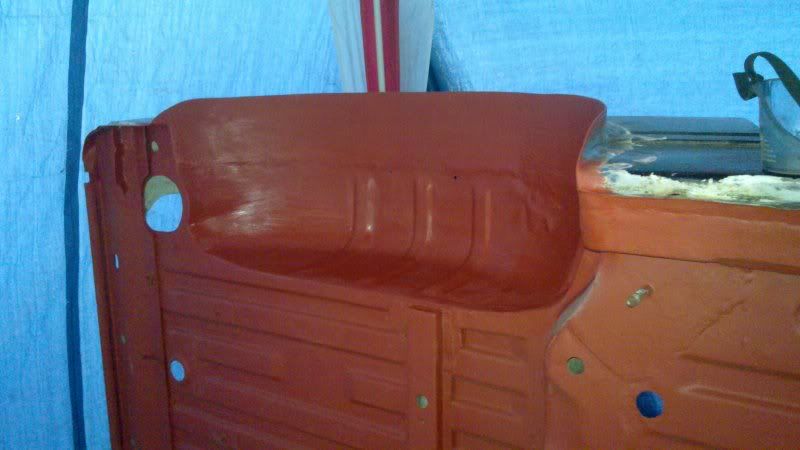
5. Now cut a strip of sheet metal a suitable width and bend it over a tyre to get roughly the correct shape. Start tack welding it in a few places to pair it up to the gap between the inner arch and the wing. You may need to cut relief slits into the inner arch to allow it to meet the new sheet. At the front of the wind behind the headlight you will need to cut out more of the inner arch to the back of the headlight retaining box and slit the last bit to let it join up.
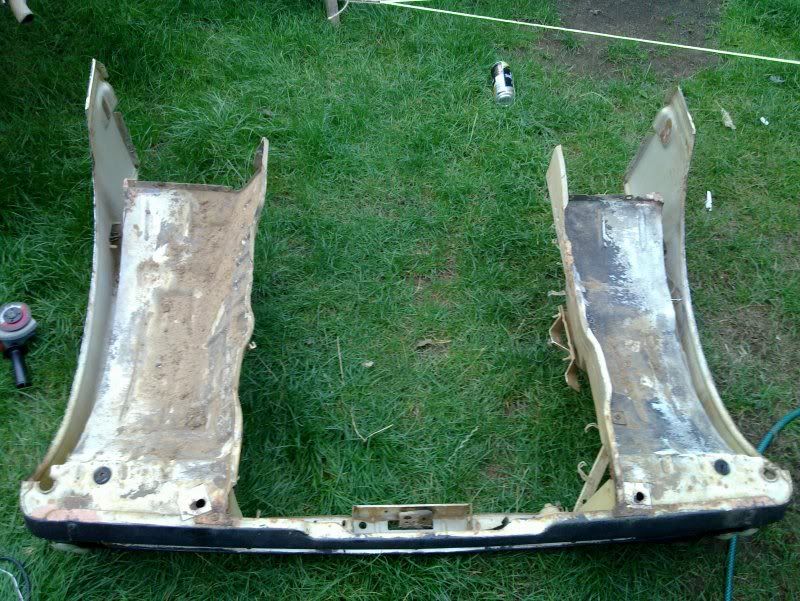
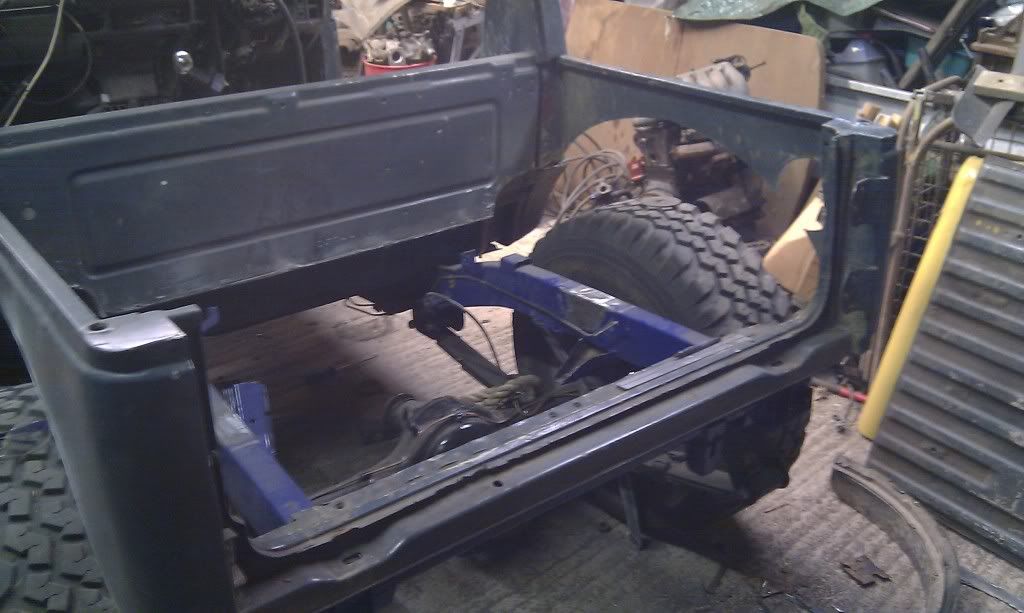
6. Leave that for now and start on the rears which will require much the same treatment as the fronts.
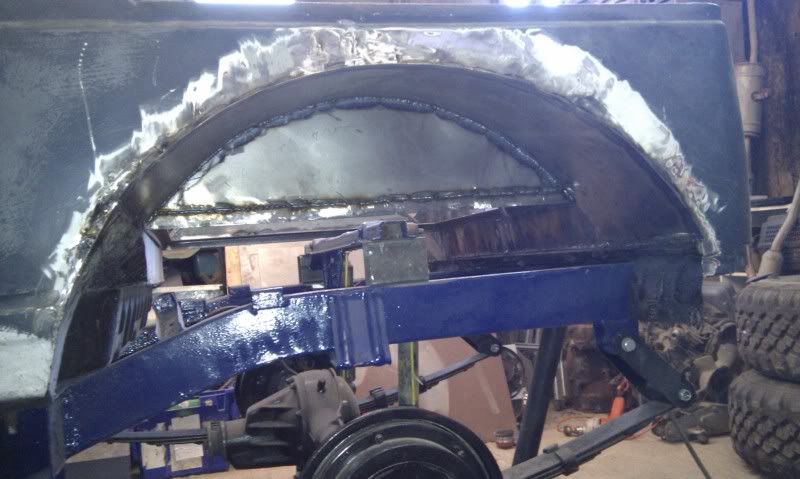
7. Now cut and tack more steel to make up the new rear arches.
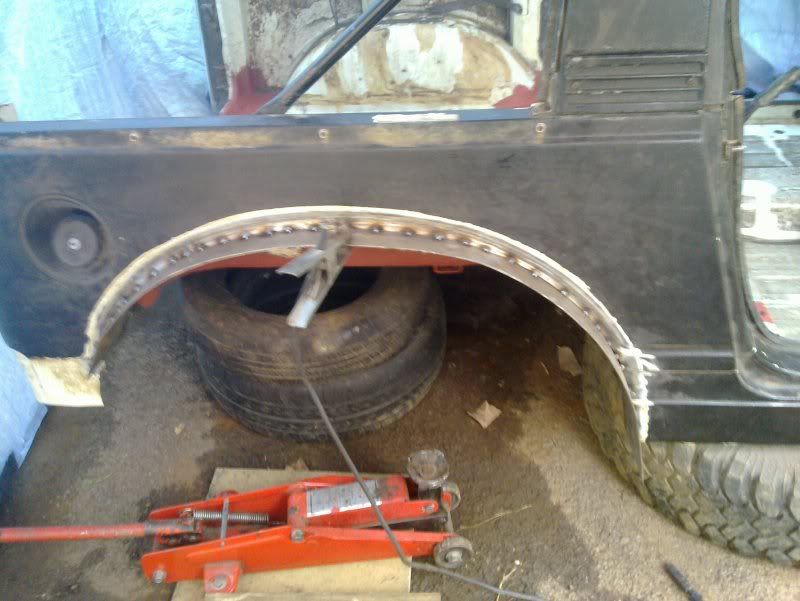
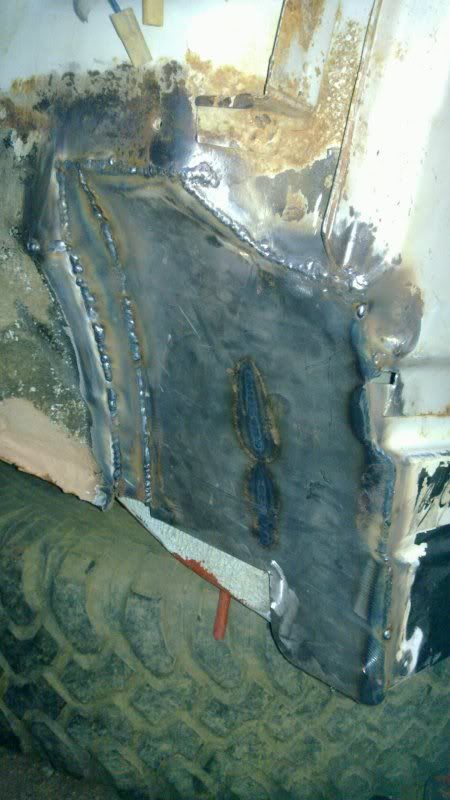
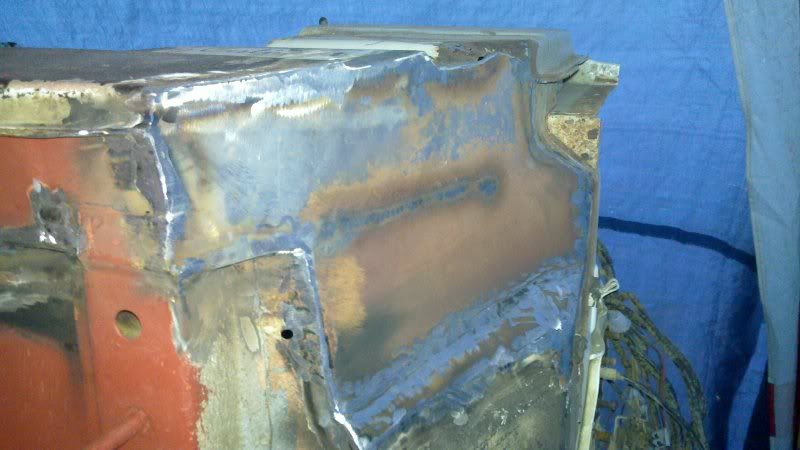
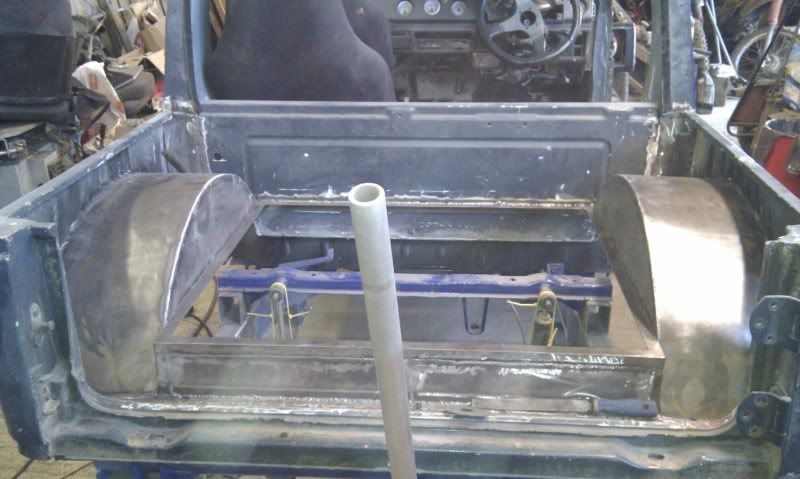
8. You now need to carefully seam weld all the joins to make the arches solid. Do an inch then move somewhere else and do an inch while that bit cools off to avoid warping. Keep working round until all of you new material is welded in place.
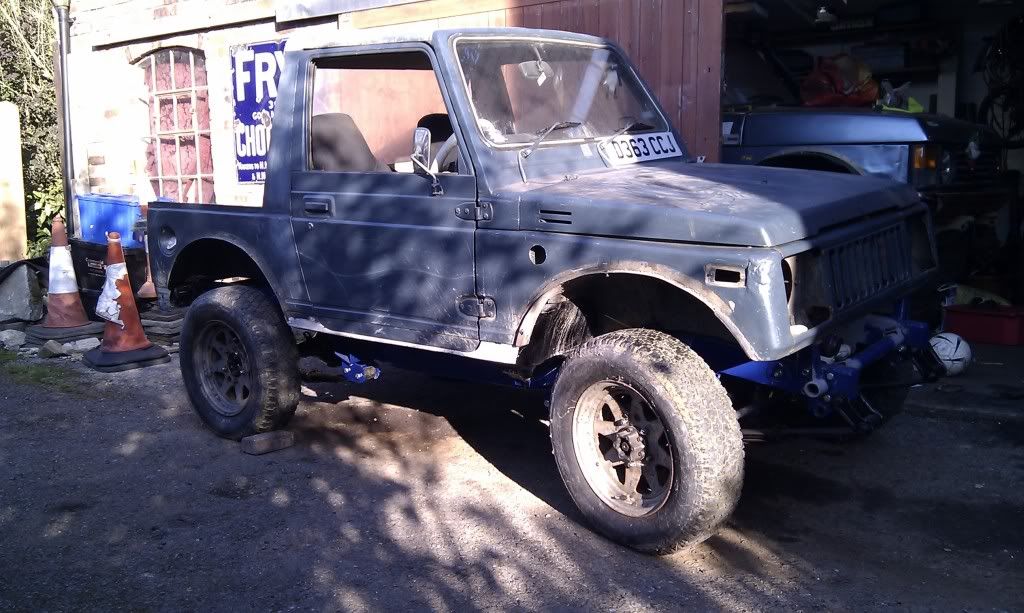
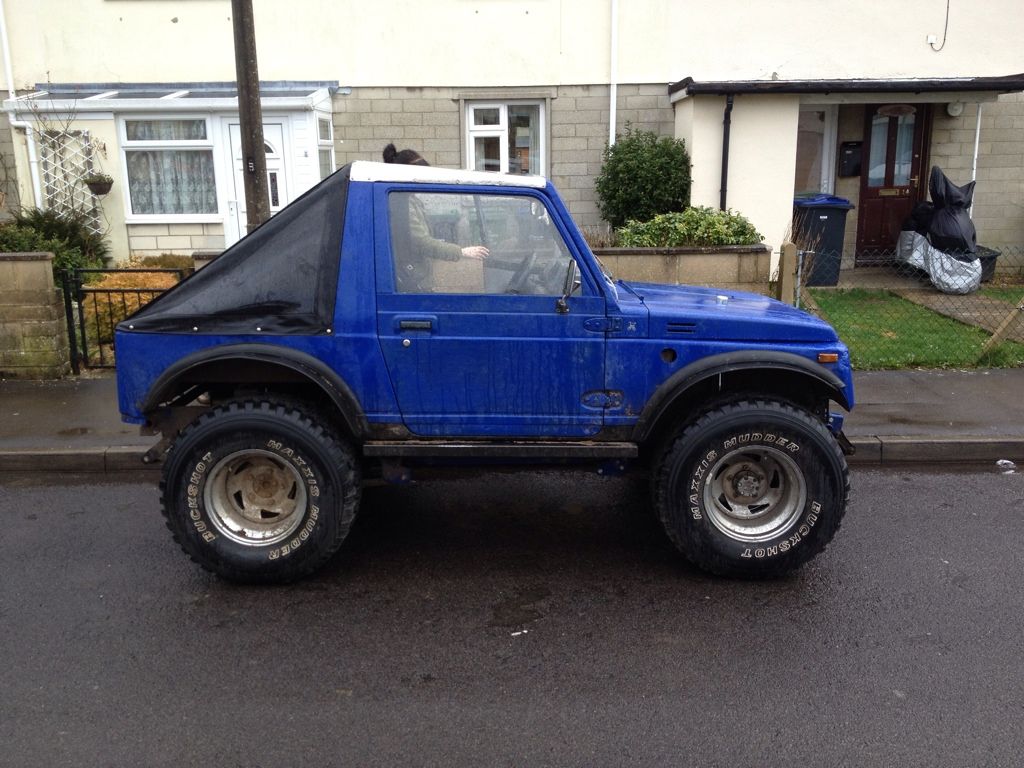
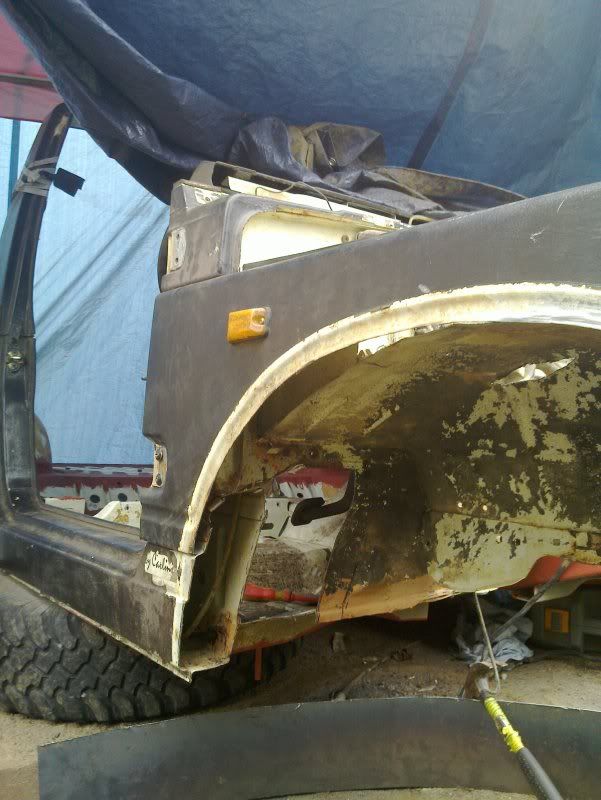
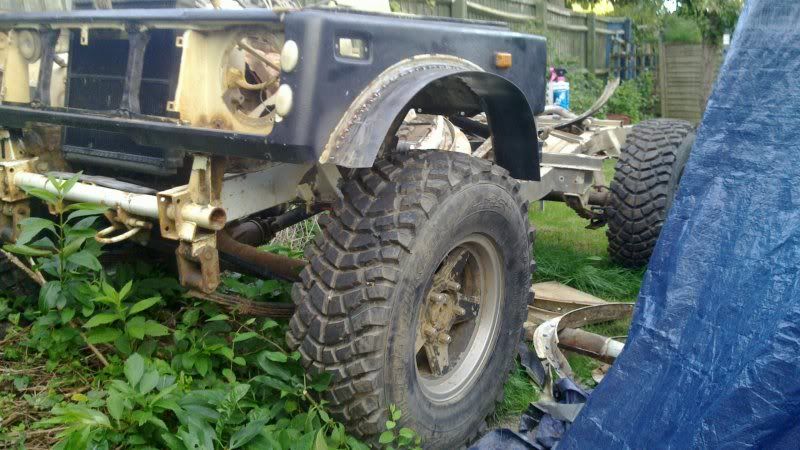
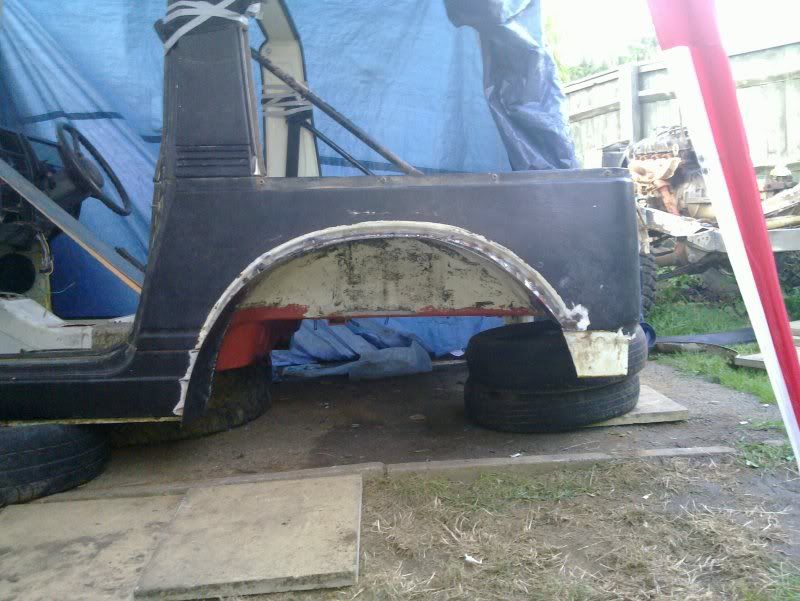
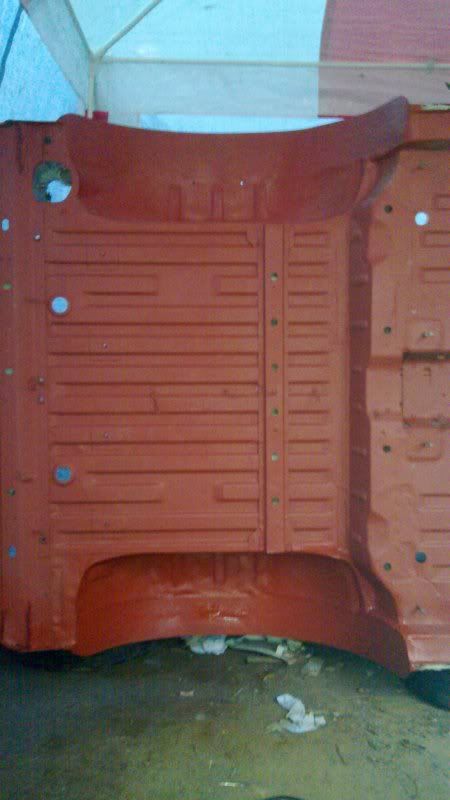
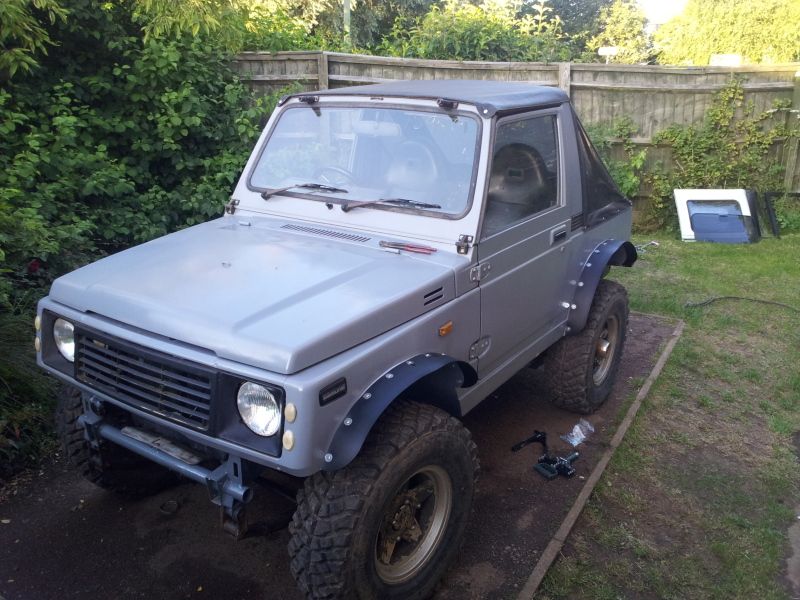
9. Now its time to pick a nice shape for your new extended arches and trim all of your new metal to suit. I left an inch sticking out to attach rubber to so I can change width any time I change axle or tyre width., Its up to you if you want to leave it a whole metal arch but by now you will be realising the rubber is a good idea as you don't want metal to meet tree and ruin all your hard work! (I also trimmed off the rear panel that used to sit behind the standard rear bumper for neatness)
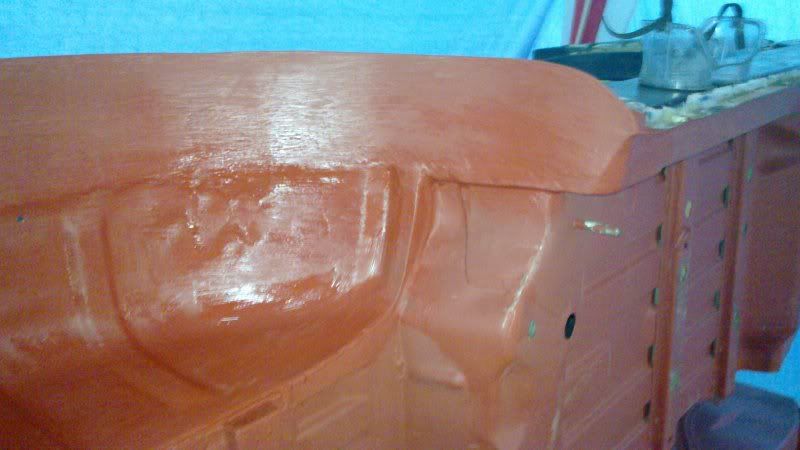
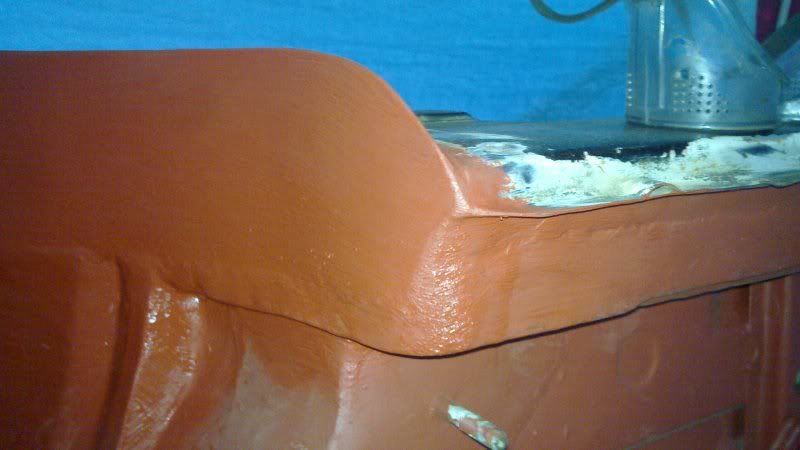
10. Now grind back all the welds on the top of the arches flush and use filler in the styling groove to hide the welds and smooth the new arch into the body.
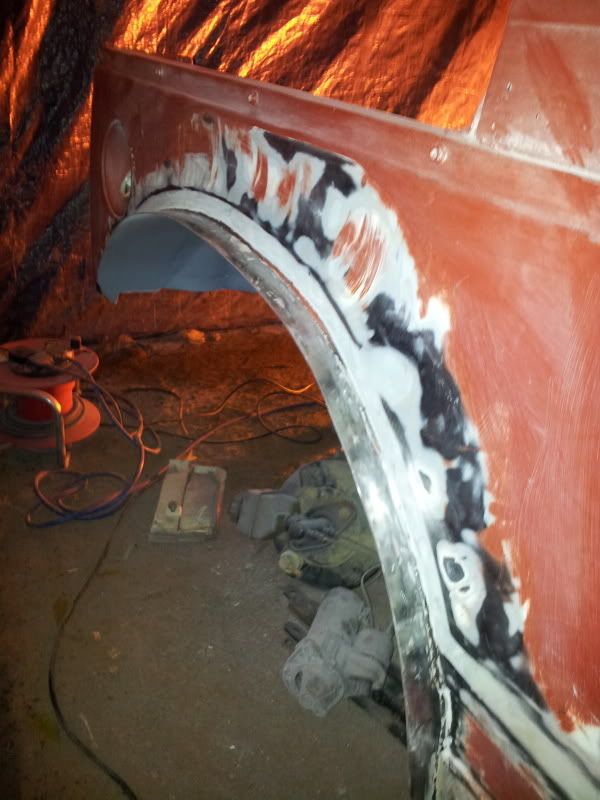
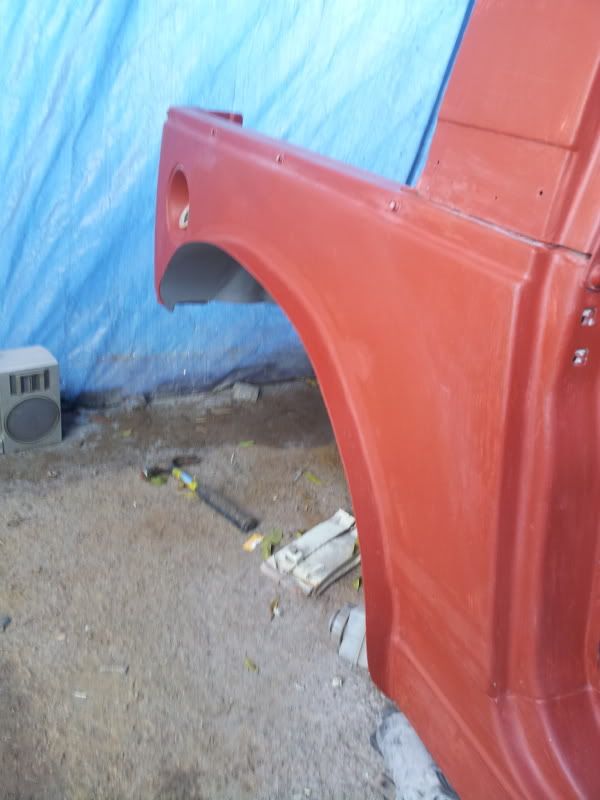
11. I now attached rubber strips to extend my arches to the width of my tyres using pop rivets and penny washers. I also filled and smoothed the styling groove on my doors to make them match the completed arches.
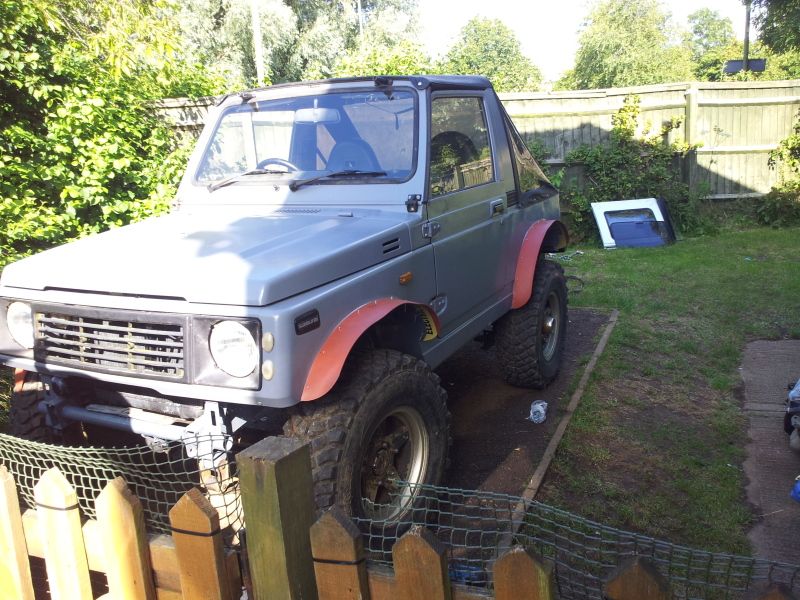
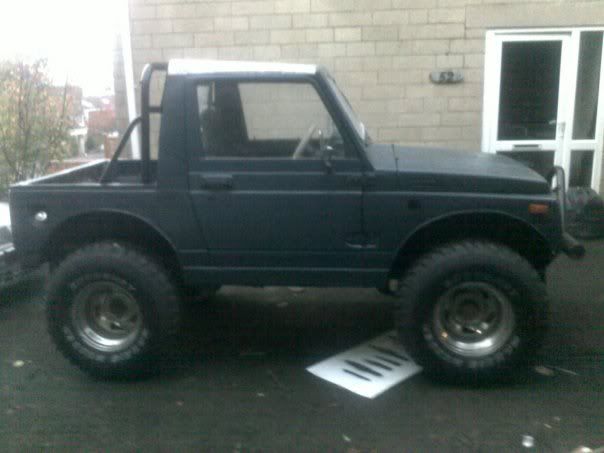
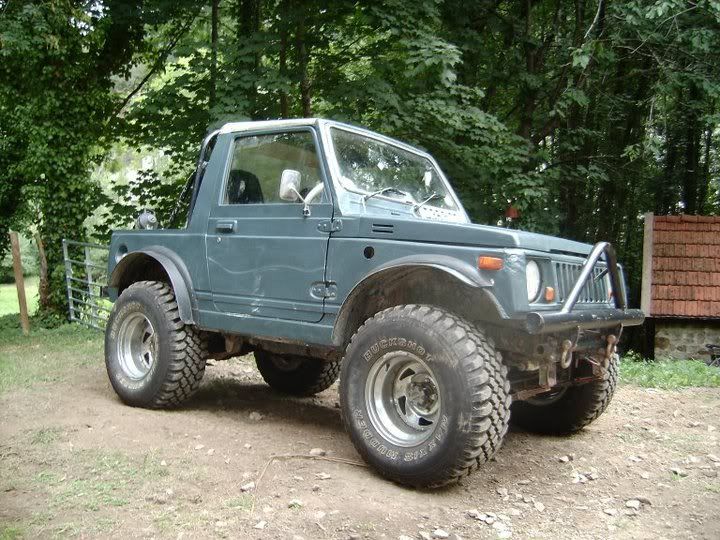
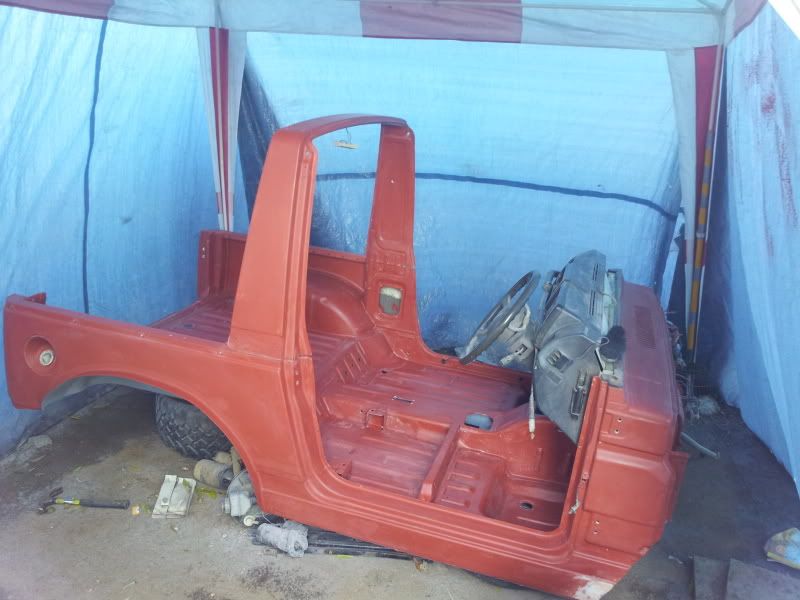
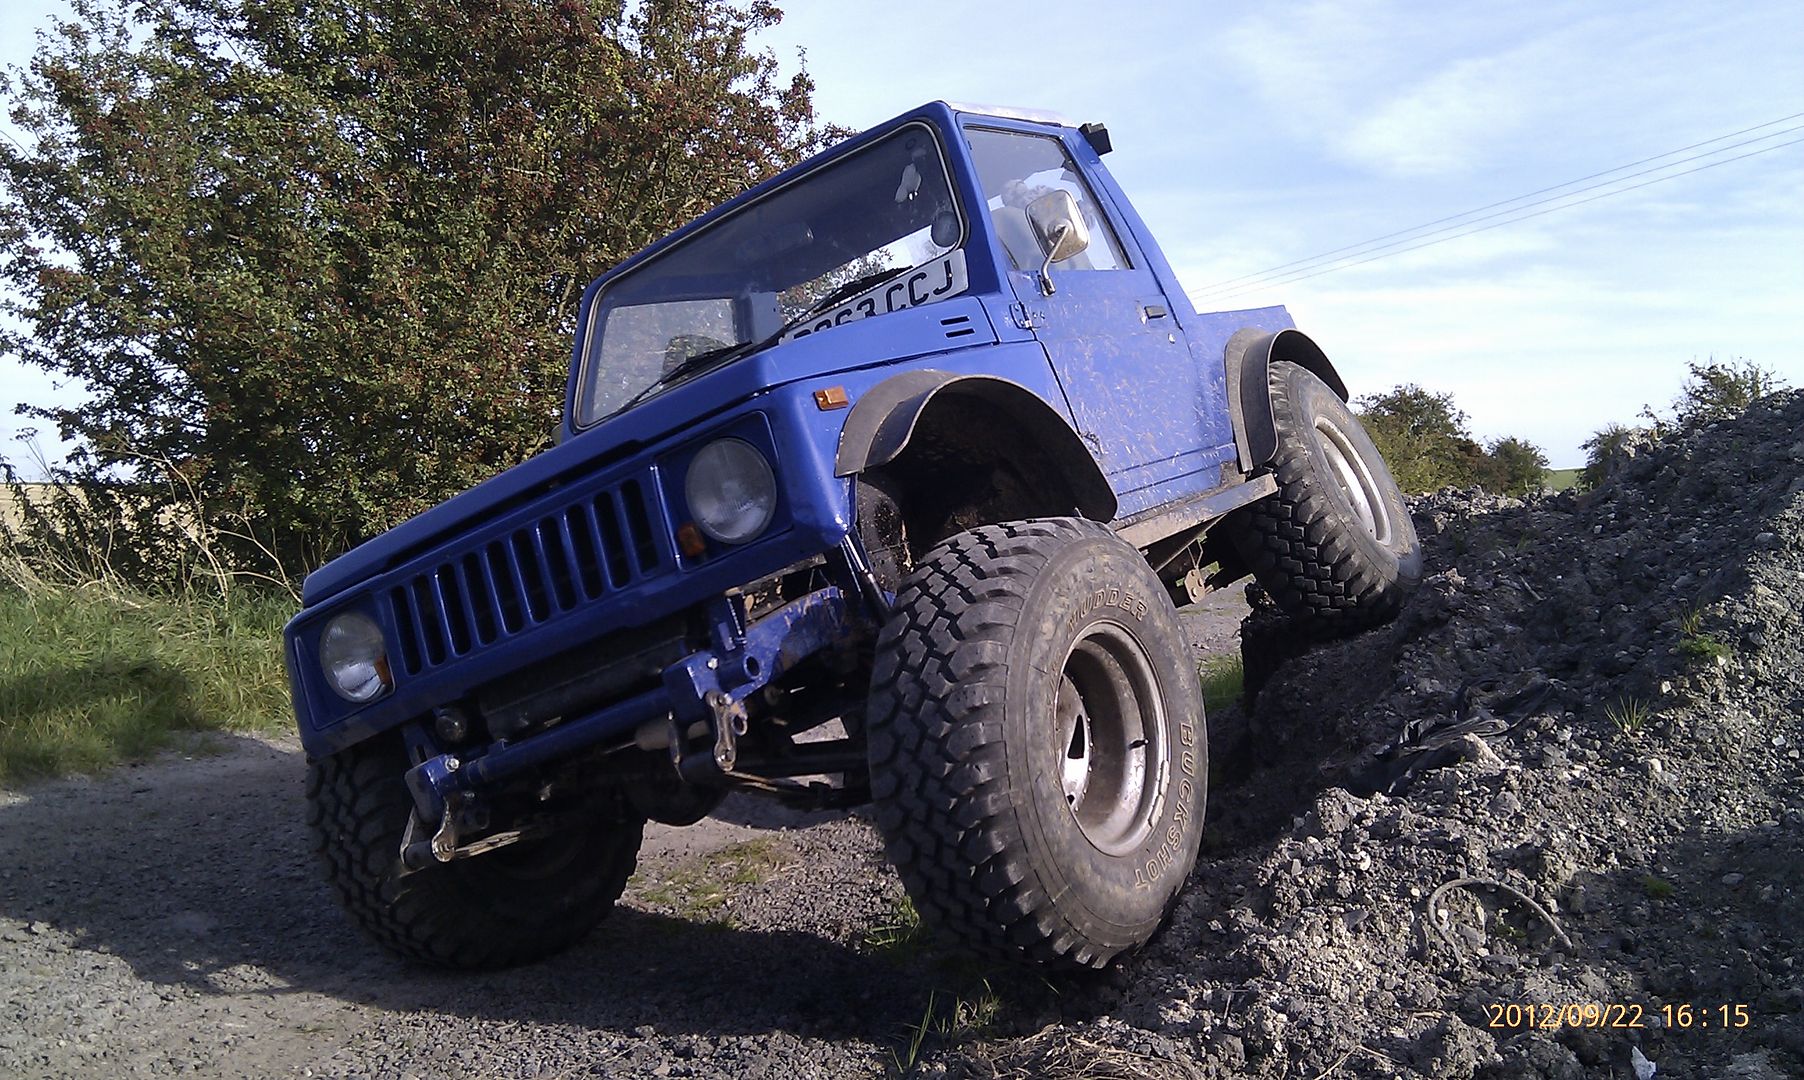
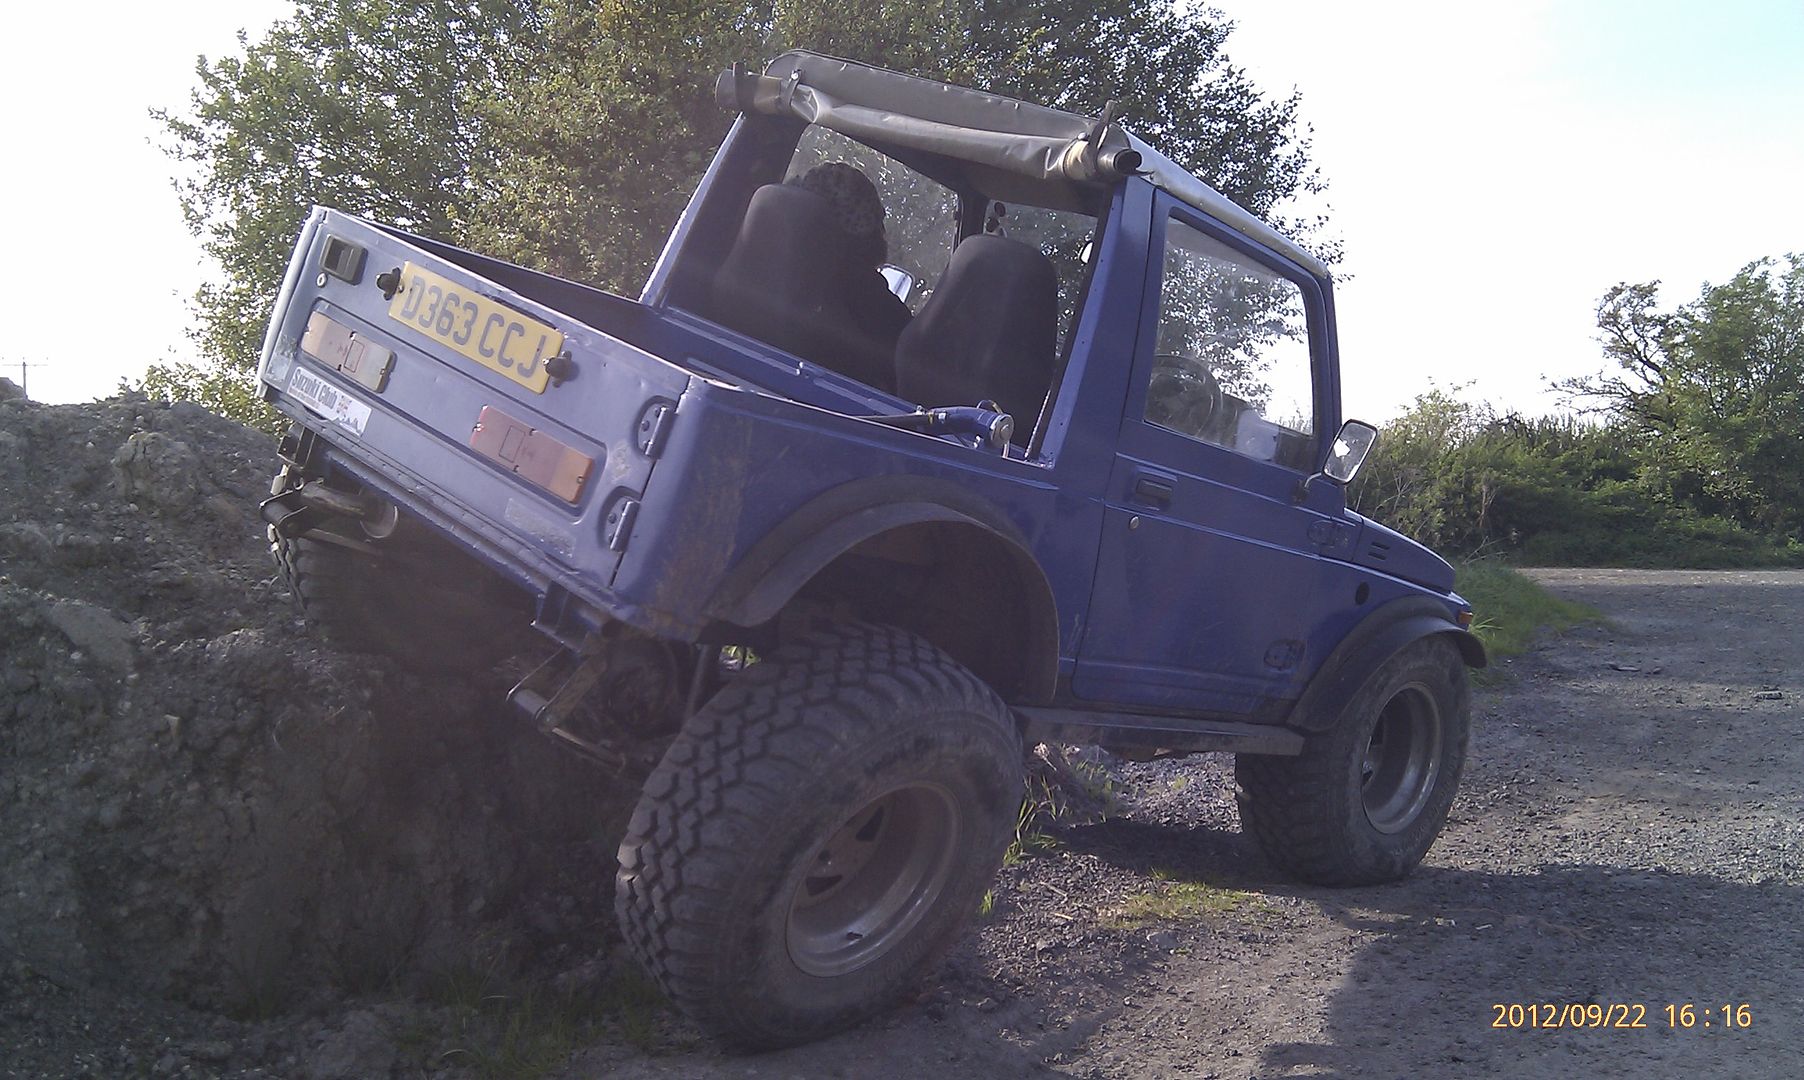
Now sit back and enjoy fitting those bigger tyres with your new lower center of gravity awesomeness!!!!
Other styles to consider:
Completely remove and re-build the arches for even more virtual lift in the style of ScottieJ


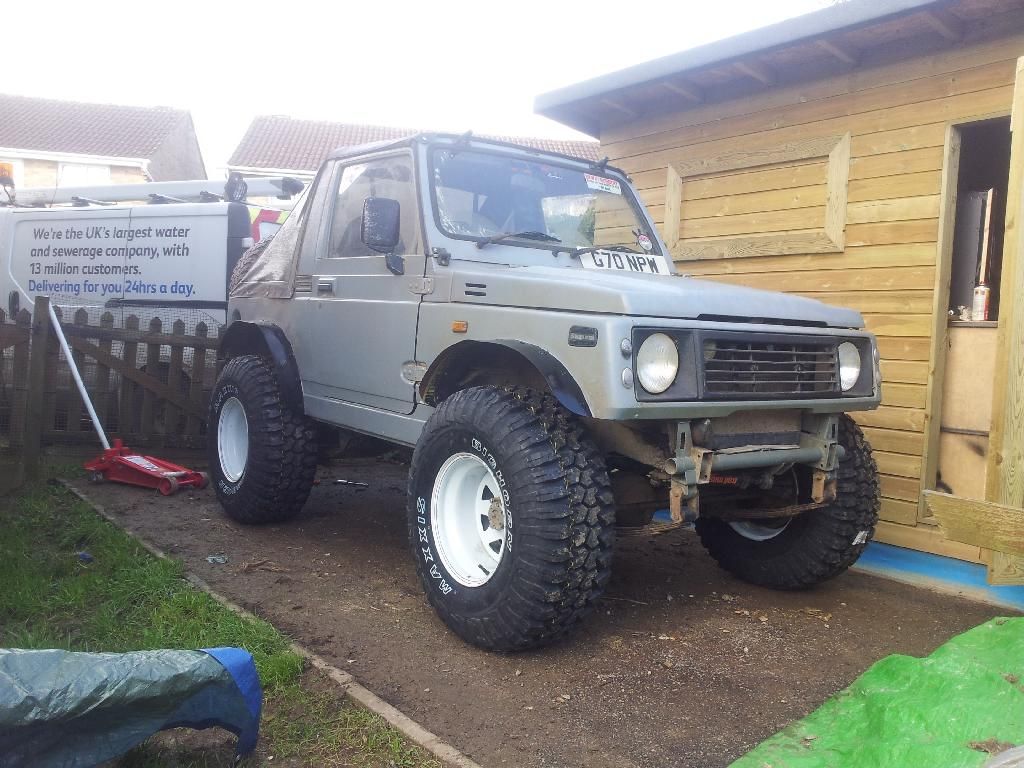
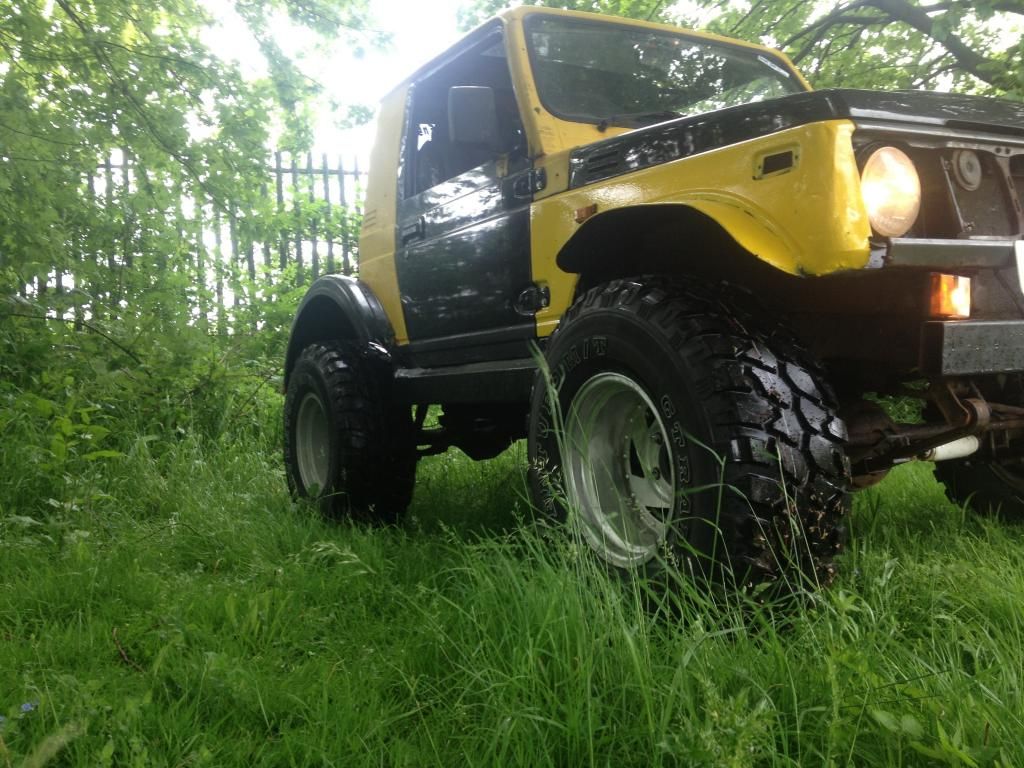
No lift clearance with 33s, hub centred in tyre.

A full metal arch in the style of Jordi
Steel trailer arches in the style of Jay18
More info and discussion on virtual lifts can be found in a thread here.
A virtual lift (or "VL" for short) is the removal of material from the body of the truck to facilitate the fitting of larger tyres without lifting the suspension or the whole body.
Why?
- Run bigger tyres without expensive lift.
- Run bigger tyres but keep center of gravity lower without lift.
- Remove rust and gain the ability to run bigger tyres/more flex at the same time.
Pros
- Above mentioned points.
- Save money on extended brake lines / shocks too.
- With less suspension lift there's no need for steering mods or prop spacers and there's less wear on prop UJs as they won't be running at steep angles.
- Can make it as wide as you want to suit your axle/tyre width.
- Stops mud from getting caught up inside the arch and causing further rust than you probably already have.
- Relatively cheap.
Cons
- Looks odd with tyre sizes smaller than 31"
- Need access to a welder and basic welding skills
- Lose originality
- Can warp/buckle your wings (It's an off-roader anyway!!!)
How to do it:
This is how I did my virtual lift which I would consider to be the easiest way of completing one.
All the new metal is 1.6mm thick mild steel sheet.
It will be considerably easier to do this with the body off the truck but can be done without removing the body.
Lets start at the front.
1. Remove the plastic arches and drill/grind the spot welds to remove the metal bracket the plastic arch was clipped to from the arches.
2. Now use the pressed indent underneath (will have already been on show on a 410) as a guide and trim the outer wing round the bottom of the indent. (You will have to guess at the ends as it doesn't continue all the way to the front or rear of the arches.
At the same time cut the inner arch at the closest point that you can to the wing that is flat and can result in a nice straight line.
(At this point if the front clip is still on the truck it will reveal how much of the bulkhead will also need trimming.)
3. Re-fit (If you took it off) the front clip to the body tub and follow the shape of the new arch shape onto the bulkhead. (I found it best to make this a bit less curved and just carry on back from the arch at a suitable diagonal.)
Mark twice and cut once. (you don't want to get this bit wrong!) (You will need to trim round or remove the accelerator pedal its up to you)
4. Remove the front clip and cut and weld a plate into the holes in the bulkhead (Both sides shown)
5. Now cut a strip of sheet metal a suitable width and bend it over a tyre to get roughly the correct shape. Start tack welding it in a few places to pair it up to the gap between the inner arch and the wing. You may need to cut relief slits into the inner arch to allow it to meet the new sheet. At the front of the wind behind the headlight you will need to cut out more of the inner arch to the back of the headlight retaining box and slit the last bit to let it join up.
6. Leave that for now and start on the rears which will require much the same treatment as the fronts.
7. Now cut and tack more steel to make up the new rear arches.
8. You now need to carefully seam weld all the joins to make the arches solid. Do an inch then move somewhere else and do an inch while that bit cools off to avoid warping. Keep working round until all of you new material is welded in place.
9. Now its time to pick a nice shape for your new extended arches and trim all of your new metal to suit. I left an inch sticking out to attach rubber to so I can change width any time I change axle or tyre width., Its up to you if you want to leave it a whole metal arch but by now you will be realising the rubber is a good idea as you don't want metal to meet tree and ruin all your hard work! (I also trimmed off the rear panel that used to sit behind the standard rear bumper for neatness)
10. Now grind back all the welds on the top of the arches flush and use filler in the styling groove to hide the welds and smooth the new arch into the body.
11. I now attached rubber strips to extend my arches to the width of my tyres using pop rivets and penny washers. I also filled and smoothed the styling groove on my doors to make them match the completed arches.
Now sit back and enjoy fitting those bigger tyres with your new lower center of gravity awesomeness!!!!
Other styles to consider:
Completely remove and re-build the arches for even more virtual lift in the style of ScottieJ
Same style but without the raised rear bed.ScottieJ wrote:Pretty much the most you can physically remove while keeping the SJ looking like an SJ in my opinion, good for 33s with no lift and possible 34/35s
No lift clearance with 33s, hub centred in tyre.
A full metal arch in the style of Jordi
Jordi wrote:
Steel trailer arches in the style of Jay18
Jay18 wrote:
More info and discussion on virtual lifts can be found in a thread here.