First some background info - What is a rocklobster? Every time larger tyres are fitted to a Suzuki it increases the gearing of the drivetrain. The clutch will need to be slipped more for the control, more speed will be needed for steep climbs to avoid stalling and engine braking down steep climbs will decrease rapidly. The ways to counteract this increase include:
Fitting a 410 t-box (A.K.A. Baby-Lobster). The gearing in the 410 box is slightly lower. High Ratio is reduced by approx. 12% and low ratio is reduced a further 20%. I did this conversion and found that it still wasnt enough for me running on 235/75/R15's.
A RockLobster takes components from both 413/Samurai and 410 t-cases. When its finally done Hi-ratio will be 12% lower (same as the 410 box), but Low ratio will be more like 80% lower. A staggering difference. Imagine 1st gear in low on a standard truck. That gear effectivly moves to 3rd gear low in a rocklobster.
RockCrawler gears are the same principle as a rocklobster but can come in different ratios, getting more expensive as the ratios decrease. The cheapest Rockcrawler is the same gearing as a Rocklobster and uses specially machined gears. This can be very expensive.
What you will need...
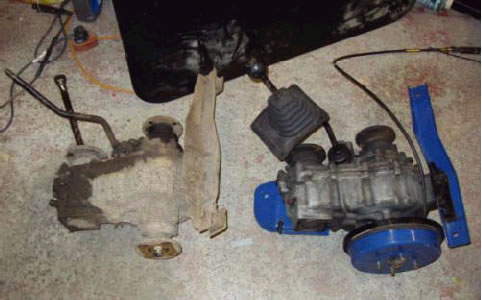
Two transfer boxes. One from a Samurai/413 and the other from a 410
Now onto the build info...
Now the boxes need to be taken apart. (Just remember to drain the oil). Have some spare sandwich bags and seperate boxes for the parts so you dont mix them up. The following steps need to be taken with both t-cases.
-
Remove the mounting brackets (12mm bolts), the flanges and the drum on the 410 case (27mm nut) and the shift lever This is done by removing the rubber gaiter, pushing down on the metal retaining piece and rotating it - It'll pop up and then just pull out the shifter.
-
Next you need to take out the speedometer driven gear. Note: YOU MUST TAKE THIS OUT OR THE CASE WILL NOT COME APART - I found this out the hard way. Although it is only held in by two rubber seals this is by far the most difficult part of the whole process - mainly because the gears on mine were stuck solid and quite corroded.
I found that making a small indent in the gear and then tapping it lightly with a hammer and chisel at an angle will loosen up the gear and it will start to rotate. With my Samurai box I was then able to pull out the gear using some small molegrips. The 410 was more stubborn. Instead i used:
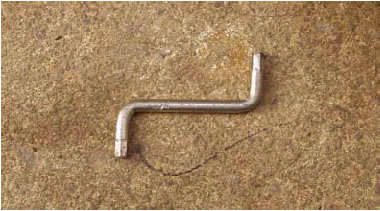
(I think I picked this up in flatpack box from Ikea to be honest) I put one end into the small hole in the side of the gear (where the screw goes to hold it in place in the box) and used a screwdriver with a bit of leverage to pull it out and it worked!
Once you've got it out - you can relax.. The Work is much smoother now.. Make sure you keep them seperate and labelled as to which case they came out of.
-
Now the 4wd Switch needs to be removed. I suggest this is where you use your first sandwich bag. The swich screws off and underneath it is a ball bearing. Keep this seperate to the other ball bearings found later on as it's a smaller size.
-
Now the case can finally be taken apart. First undo the bolts that hold the front of the case and take the front section off (there will be a gear/cog that will come out as its only held in by a selector so be careful).
-
Now a hex nut needs to be taken out. This is located on the middle part of the case near the selector rods:
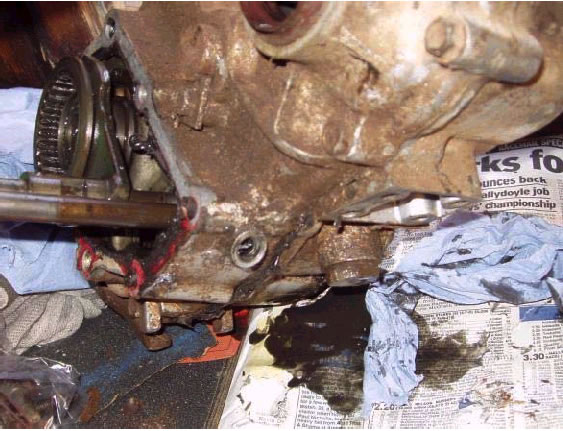
Under this nut is a spring and a ball bearing. DO NOT lose these! (I suggest a second sandwich bag is used.)
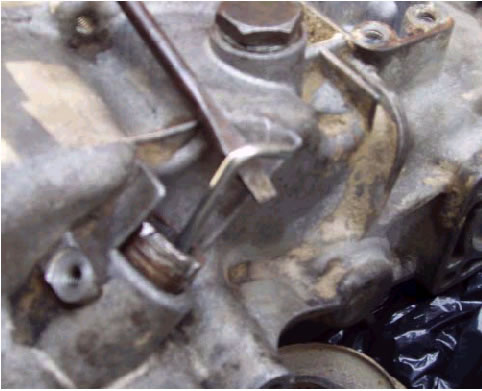
6. Now undo the bolts that hold the two halves of the case - DO NOT undo the bolt indicated below: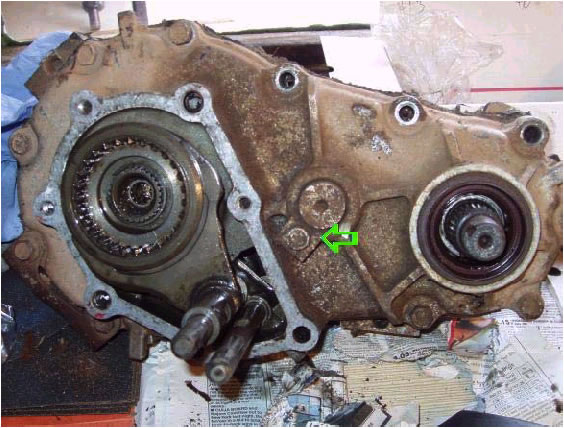
With a bit of gentle persuasion the case will come apart. Be careful of the gold colour shims that may fall out. These go either side of the intermediate (middle) gear 'bubbled' side being visible.
-
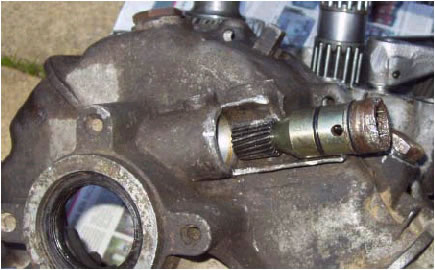
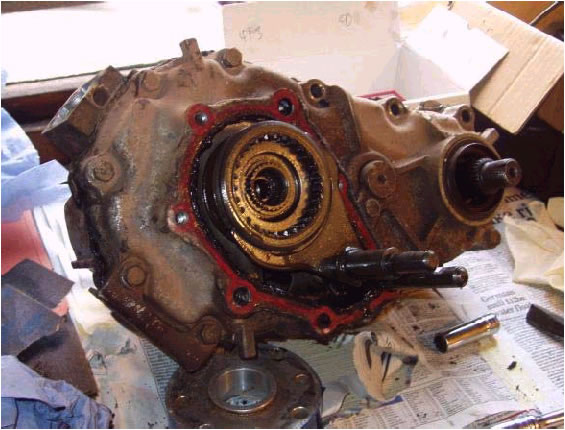
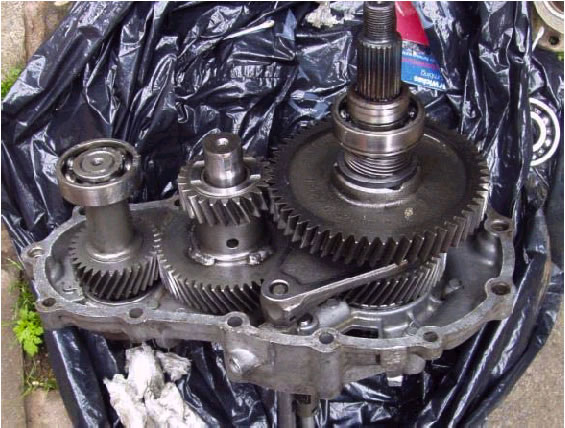
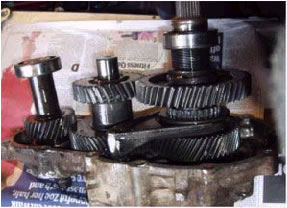
With the case now apart, the output shaft needs to be taken out. The 413 case is shown in the photo:
Pull the gear in the direction of the arrow. If it's stubborn, tap the underside with a hammer. The selector (labelled with the smaller arrow) will need to be raised to allow the gear to come out, but you shouldn't need to remove it completly - only enough to allow the gear to be removed.
The rest of the gears can now be removed from the case. Remember to keep them clean and away from any dirt or you'll need to be replacing bearings.
This is also where a 2WD low modification can be done. - Click here for these instructions.
-
Now the gears are out, the swapping needs to be done. The intermediate is the hard one to do. This needs to be machined (or cut and welded). I found a friend willing to do the work (who has done others before) so I sent off the gears and got one back. The end result - the smaller gear on the 413 replaces the smaller gear on the 410.
-
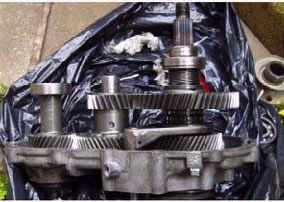
The output shaft now needs to modified to accept the new intermediate gear. In the final rocklobster gearset, you will use the 413 out-put shaft.
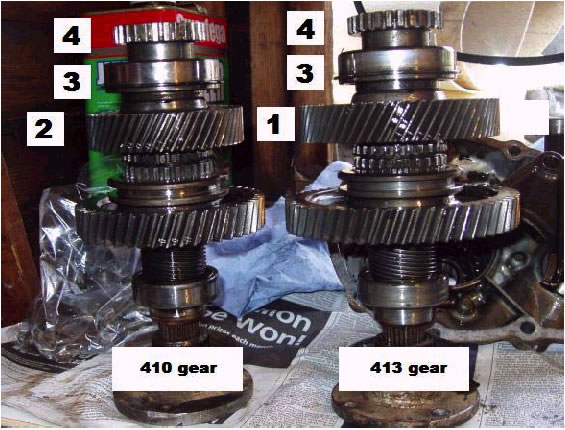
Firstly you will need to take off the counter gear (4) and bearings (3). The counter gear is held on with a circlip, remove this and then use a bearing puller to remove 4 and 3. The shaft however is hollow for a good inch or so which creates a bit of a problem. To get around this put a bolt down the hollow spline and use the bearing puller pushing down on the bolt. Works a treat. TIP: if you find it easier, you can stand the gear up using one of the flanges. Makes things a bit simpler.
Take off gear (1) - it should slide off easily, and in its place put gear (2). Now replace the bearing (3) and counter shaft (4). Compare the bearings and use the smoothest bearing out of the two. The counter gears (4) should be the same so can be interchanged. (3) and (4) will need to be hammered on to the shaft - Use a big socket that will fit over the spline to do this, and plenty of grease..
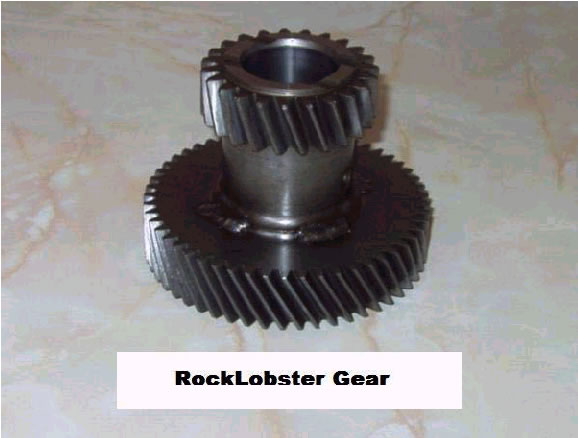
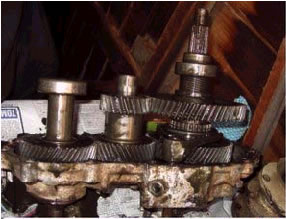
You will then have your RockLobster gear done, and it should look something like this.
-
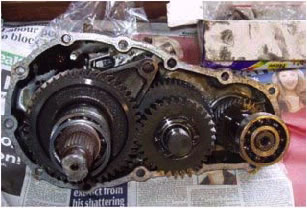
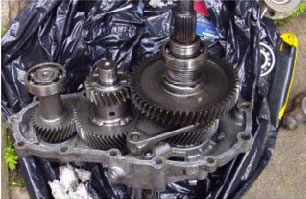
Once you have the new gears all done, clean up the case you are going to use (it doesnt really matter if it's the 413 or 410 case, but if you are going to use the transfer box handbrake the 410 would need to be used) and put the gears into the case.
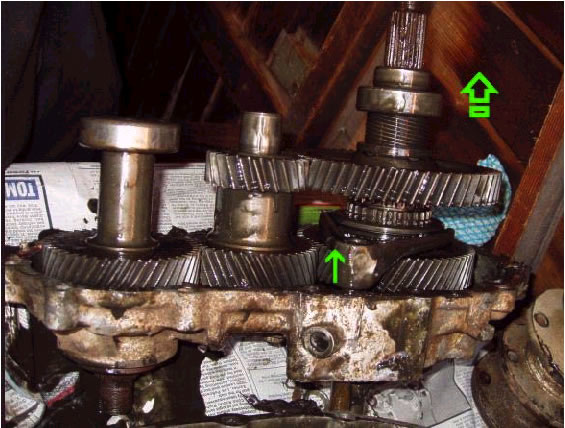
I found it easiest to put the input gear (left of the photo) in first, as the bearing may need a bit of persuasion to go in. Again, use a bit of grease to make it a bit smoother. The intermediate should go in next. Don't forget to put a gold shim (bubbled side up) under the gear, and the roller bearings either side of the spacer of the shaft. The gear then fits on top of these.
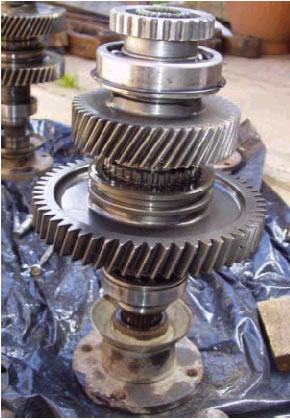
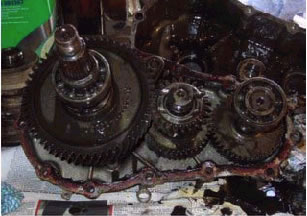
Now, the new output shaft can go in. Put the selector in place on the selector ring in the middle of the gear. Then, slide the selector rod down the hole, and follow it down with the gear. The bearing will fit in the hole, again, it may need tapping in with a hammer. Once this is done, you will have a gearset that looks like this:
-
Now the case can be put back together again. (Again, don't forget the other gold shim that goes on the other side of the intermediate gear.) Make sure you get the proper gaskets too. These wil need to be bought from a main Suzuki dealer, when I got mine they cost me £4.22. Dont be tempted to use the silocone 'instant gasket' stuff you can get. The proper paper gasket is needed for the measurements of the gears. Without this proper gasket the gearsets will fail rapidly.
Put the gasket in place on the main body of the case and put the two main sides together. Again, a little persuasion with a hammer may be needed. Now put the front of the case back on, again, wth the appropriate gasket and the ring gear held by the selector (this will need to be lined up with the counter gear on the output shaft).
Now replace the spring, ball bearing and hex nut from step 5 of this write-up, the ball bearing and 4wd switch from step 3 and then finally the speedometer gear. You will need to use the one from the 413 case.
Next, replace the mounts, and now its ready to be put back under your Suzuki.once its in, and fitted, put the shifter lever back in (its much easier to put in afterwards than trying to put the box back under with it already in).
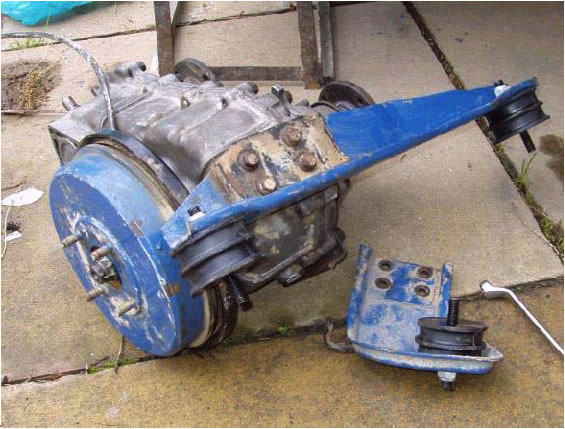
I would also suggest using stronger rubber mounts for the box. The amount of torque the lower ratio produces will mae short work of the standard Suzuki mounts. To solve this problem, I used landrover engine mounts (pictured), which cost less than £5 for all three. Alternativly, aftermarket polyurethane mounts could also be used.
You should now be ready to enjoy crawling along up slopes in a nice and controlled fashion, as opposed to pointing the Suzuki in the right direction and flooring it. You can also say goodbye to slipping the cluth so much!
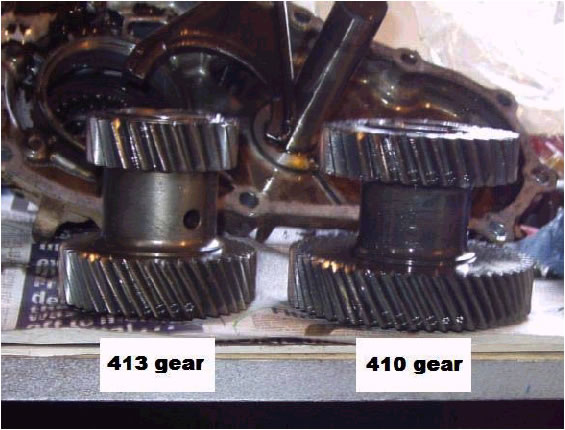
| 413 gears | |
|---|---|
 |
 |
| 410 gears | |
 |
 |
| Rocklobster gears | |
 |
 |
Gear comparison
The last thing to mention is that people who have done this mod sometimes say the box will whine a little bit more than usual. This is nothing to worry about and can settle over time, this is due to the differnt gears being mixed together. Although in my own personal experience, I didn't notice any whining after doing the mod.
Enjoy!
Credits...
This Rocklobster article was written and submitted by Andy (A.K.A. andy b).

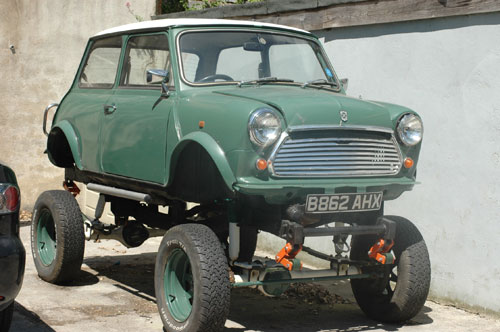
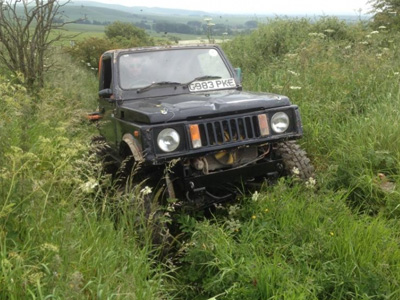
![0610_4wd_01z+suzuki_samurai+group_of_suzukis[1274].jpg](/images/gallery/favourites/0610_4wd_01z+suzuki_samurai+group_of_suzukis[1274].jpg)

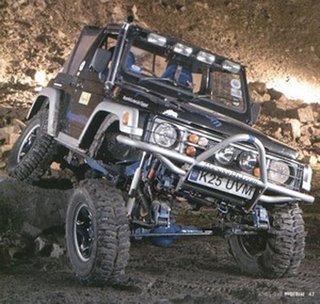
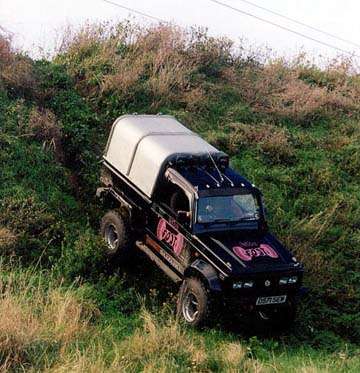
![fenderfrt6_SJ-1[376].jpg](/images/gallery/favourites/fenderfrt6_SJ-1[376].jpg)