There are three types of auxillary lights that can be fitted to the rear of the vehicle. One is a rear foglamp, the second is a reversing light. Both of these are normally fitted by the vehicle manufacturer. The third type is a small floodlight mounted unobtrusively at the rear of the vehicle. This floodlight can be a huge advantage when you are hitching up a trailer, undertaking repairs to a second vehicle in the dark, or when performing a tricky reversing manoeuvre at night. Fog lights or reversing lights can be fitted in a similar manner.
Tools and equipment ...
Small low power floodlight or spotlight (obviously)
Electrical tape
In line fuse holder and 15 Amp fuse
Switch
20 Amp "Bosch" or "Hella" relay
"14 guage" wire
Spanners
Screwdrivers
Solder
Soldering iron
Wire cutters
Multimeter
Installation ...
Mount the rear light in an accessible position, above or below the rear bumper. It can also be mounted on the roof of the vehicle. Irrespective of where it is mounted, you must take into account the fact that the rear spotlight must not be activated in such a way as to cause any other driver to complain about it's use, so it is necessary to connect it in such a way that it can only be activated if the reverse gear is engaged.
In plain English, do not use the rear mounted floodlight to dazzle or offend other motorists.
Wiring ...
Now it's time to start on the wiring. Connect the auxillary light earth / ground wire to a good earth point on the body or chassis of the SJ. It is easiest to use one of the existing earth points on the vehicle body if possible. Run a single wire from the rear auxillary light to a central point in the engine compartment using one of two options. The choice will depend a great deal on where you have chosen to mount the rear auxillary light. If the light is mounted under the rear bumper, it would probably be easier to run the wires underneath the SJ along the chassis, following the original wiring loom. Use cable ties to secure the wires along the way so that they are held securely out of the way of any moving parts, but allow enough slack on the cables for body movement where necessary. Alternatively, if the rear auxillary light is mounted on the roof, you would need to drill a small hole in the roof, install a rubber grommet and then route the wire through this rubber grommet into the cab (remember to seal this grommet and wire with rubber silicone). Run the wire along to the front passenger side of the cab and finally out into the engine bay through the large rubber grommet in the firewall .
It is not important how you get the wire to the front of the vehicle, either way, the wires need to be run to a point near the battery where the relay can be easily mounted on the upright metal plate in front of the battery. As always, try and use a Black wire as an "Earth" or "Ground" wire. This makes connecting all the wires much easier later on.
The connections are relatively easy, and all wires connected to the relay must be terminated with insulated "spade" connectors to reduce the risk of corrosion and electrical shorting.
Terminal "30" is the "common" power input to the relay contacts (87 and 87a) and is connected directly to the battery via an in-line fuse.
Terminal "85" is the connection for the relay
Terminal "86" is connected to the rear light
Terminal "87" is connected to the positive wire of
Terminal "87a" is not connected. Insulate it as
there will be power to this point when the relay is off.
Once the auxillary light power wire is in the engine compartment near the battery, test to see that the light is working by temporarily connecting the positve wire of the rear spotlight directly to the positive terminal of the battery. The light should come on. Once you are happy that it is working, terminate this joint with an insulated "spade" connector, and connect it to terminal "87" on the relay.
The next step is to connect power to the rear light. This is done by cutting another length of wire, terminating one end with an insulated "spade" connector, and connecting the other end to an in-line fuse holder. The "spade" connector is then connected to terminal "30" of the relay. Connect another length of wire to the other end of the in-line fuse holder, and terminate this with a "ring" connector. This is then connected to the positive terminal of the battery.
Do not put the 15 Amp fuse in place just yet ! !
It is very important to use a fuse, as this protects the wiring from burning out if there is an electrical short. It's easier and cheaper to replace a fuse that it is to replace the wiring !
Next we need to provide a good earth for the relay. Cut a length of black wire, terminate one end with an insulated "spade" connector, and the other end with a "ring" connector. The "spade" connector is connected to terminal "85" of the relay, and the "ring" connector is earthed to the vehicle body at an earth point.
Now it is time to decide where you want to mount the On/Off switch for the rear light. Dashboard aesthetics can mean a lot, even in the humble SJ, so if possible, try and get your hands on a standard SJ switch. These are easier to mount into the dash without having to drill holes as there are usually unused accessory switch bays available. At the end of the day, where you put your switch is entirely up to you. Just make sure that there is enough space behind the switch so that wires will not short out.
Before moving on, it is probably wise to test that the rear light and relay work as they should. Connect a length of wire to pin "86" of the relay, and touch this wire to the positive terminal of the battery. The relay should click and the rear light should come on. If it does not, check all wiring now, before going any further.
Now comes the difficult bit. Wiring the auxillary light so that it is switched on only when the reverse gear is engaged. Due to the auxillary switch being triggered by the reverse light from the gearbox, you will need to run two wires into the cab of the SJ to where the swicth is located. Terminate one wire with an insulated "spade" connector, and connect it to pin "86" on the relay. The other wire is connected to the switched wire on the reverse light switch on the gearbox. Keep these wires clearly marked, and insulate the ends prior to pulling them through as there will be power to the one wire from the gearbox reverse light switch.
Once again, the easiest way to do this is to route the wires to the passenger side of the engine bay through the large rubber grommet in the top right hand corner. Run the wires through the centre of the grommet, along with all the other wires. Once inside the cab, route the wires along the original wiring harness until you reach a point where to can take it to the On/Off switch. Connect these wires to the switch. One wire will supply power to the switch, while the other supplies power to the relay from the auxillary switch, thus triggering the relay and activating the lights.
Finally ...

Now that every thing is wired up and tested, tighten all the bolts so that the floodlight remains stable, but can still be moved and adjusted by hand to aim at wherever it is needed. Aim the light and then finally tighten all the nuts and bolts so that the light is secure. Thats all there is to fitting the rear floodlight!
re is to fitting the rear floodlight!


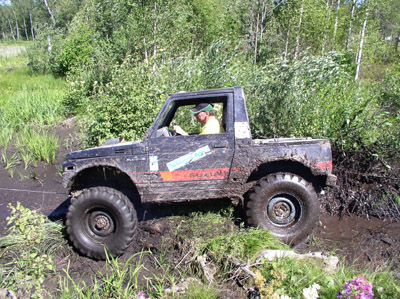
![0610_4wd_01z+suzuki_samurai+group_of_suzukis[1274].jpg](/images/gallery/favourites/0610_4wd_01z+suzuki_samurai+group_of_suzukis[1274].jpg)


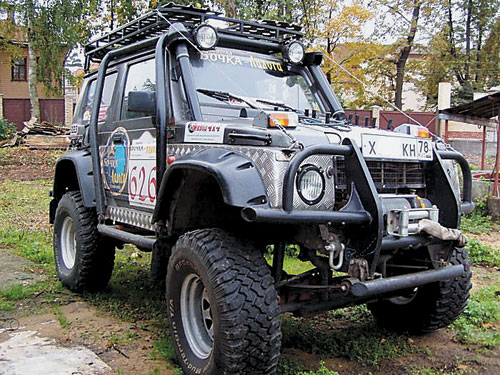
![fenderfrt6_SJ-1[376].jpg](/images/gallery/favourites/fenderfrt6_SJ-1[376].jpg)